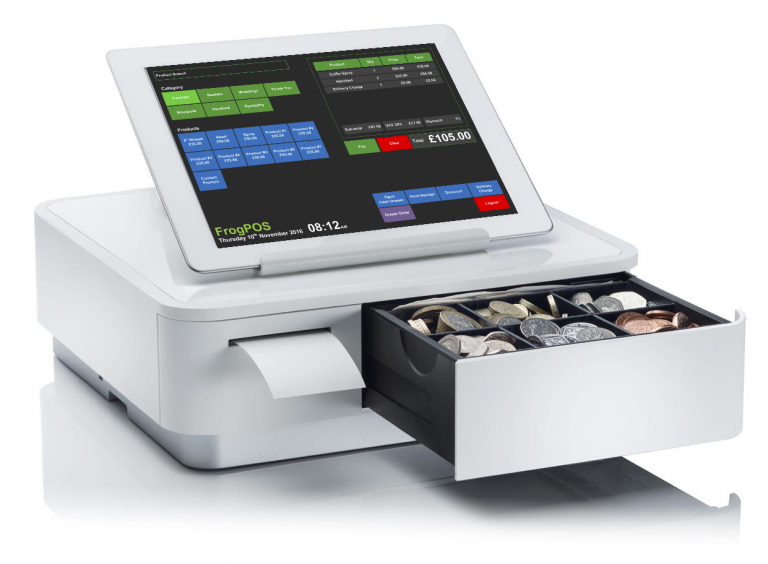
FrogPOS Installation
Introduction
This document will guide you through the following steps:
- Setting up your mPOP all-in-one receipt printer and cash drawer
- Setting up your iPad with the mPOP including charging your iPad from the mPOP
- Setting up Bluetooth on your iPad to connect to the mPOP
- Installing FrogPOS from the Apple app store
- Connecting FrogPOS to the mPOP
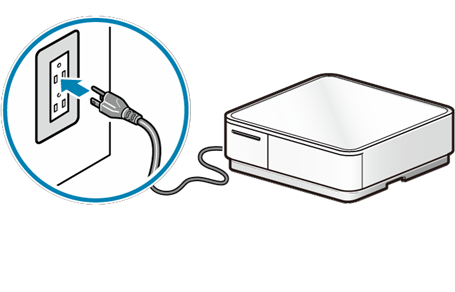
Connect Power Cable
Connect the power cable that comes with mPOP. Confirm the information in Safety Information – Power before connecting.
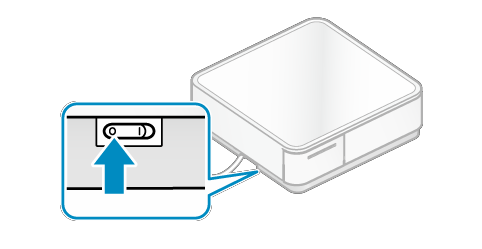
Turn power off
- Turn off the power of mPOP
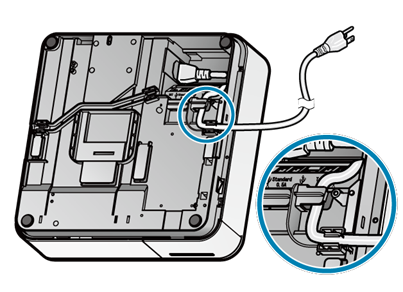
Connect power cable
- Take note of the direction of the power socket, and connect the power

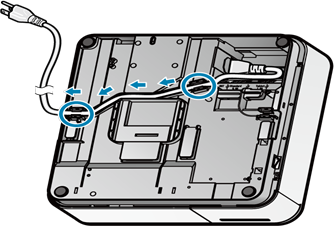
Wire power cable
- There are 2 cable outlets to the right and left, and it can be wired according to where mPOP is place
- Wire it so it goes underneath or between the power cable hook and pull it out through the outlet.
Wiring Example 1
Wiring Example 2
Insert power cable plug into electrical outlet.
Set up tablet stand and tablet
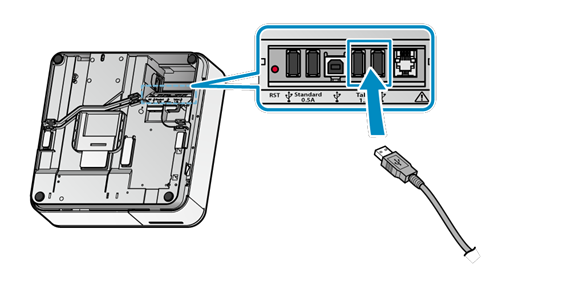
Charging from mPOP
- Connect the USB cable you use with the tablet to the USB port (1.5A) to charge your tablet.
- A USB cable for the tablet is not included in the Use a commercially available USB cable (or one that came with the tablet).
- Connect the USB cable connector to the port on the bottom of mPOP (either of the ones indicated).
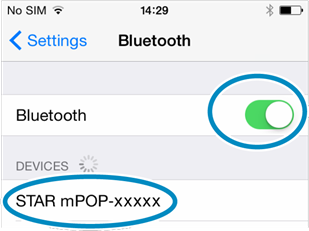
Setting up Bluetooth on iPad
- Open the setting screen of the tablet and select Bluetooth

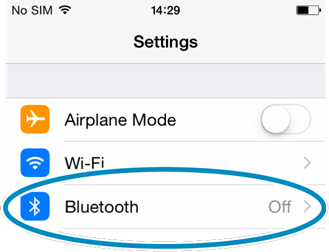
- Turn Bluetooth from Off to On
- Select “STAR mPOP-xxxxx” from Devices
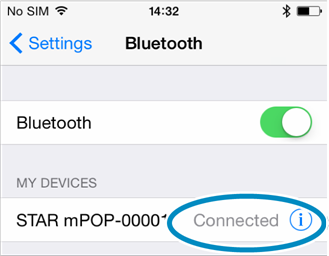
Confirm Bluetooth has connected
- When connection is complete, “Connected” will be displayed next to the device
Install FrogPOS from App Store
- Click on App Store icon on your
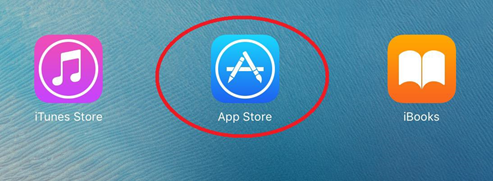
- Search for “Floral Frog” and then download and install the "FrogPOS" app. You will require an iTunes account to access the app store. You can sign-up for free if you don’t have one.
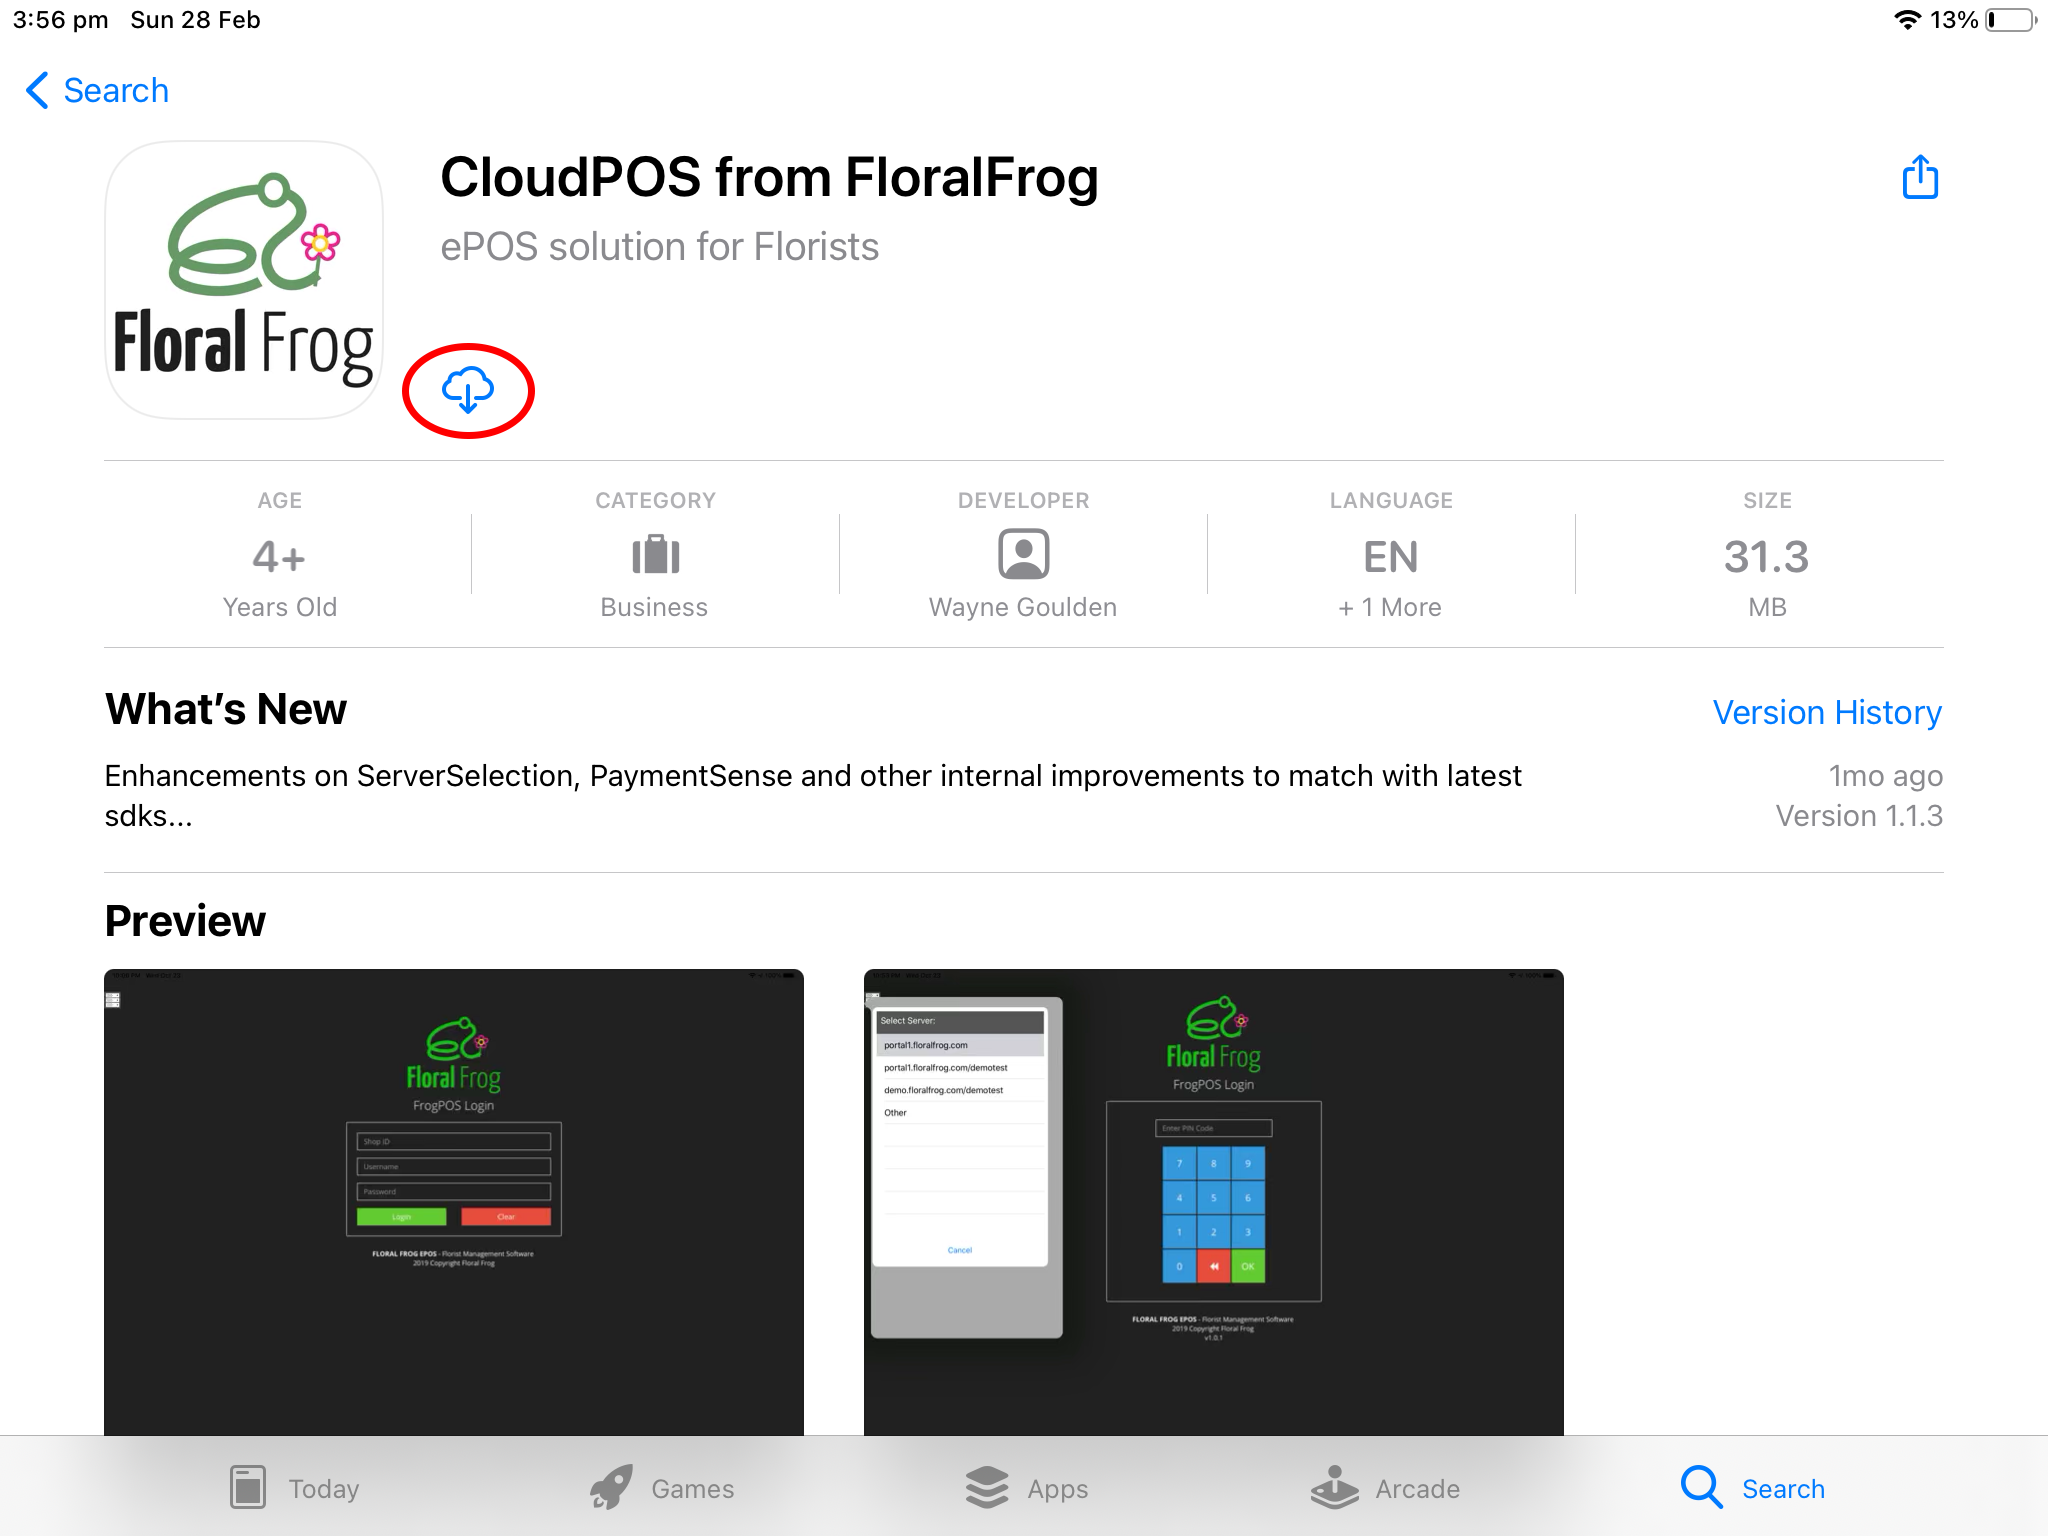
- Once installed locate the FrogPOS icon on your iPad and click to open.
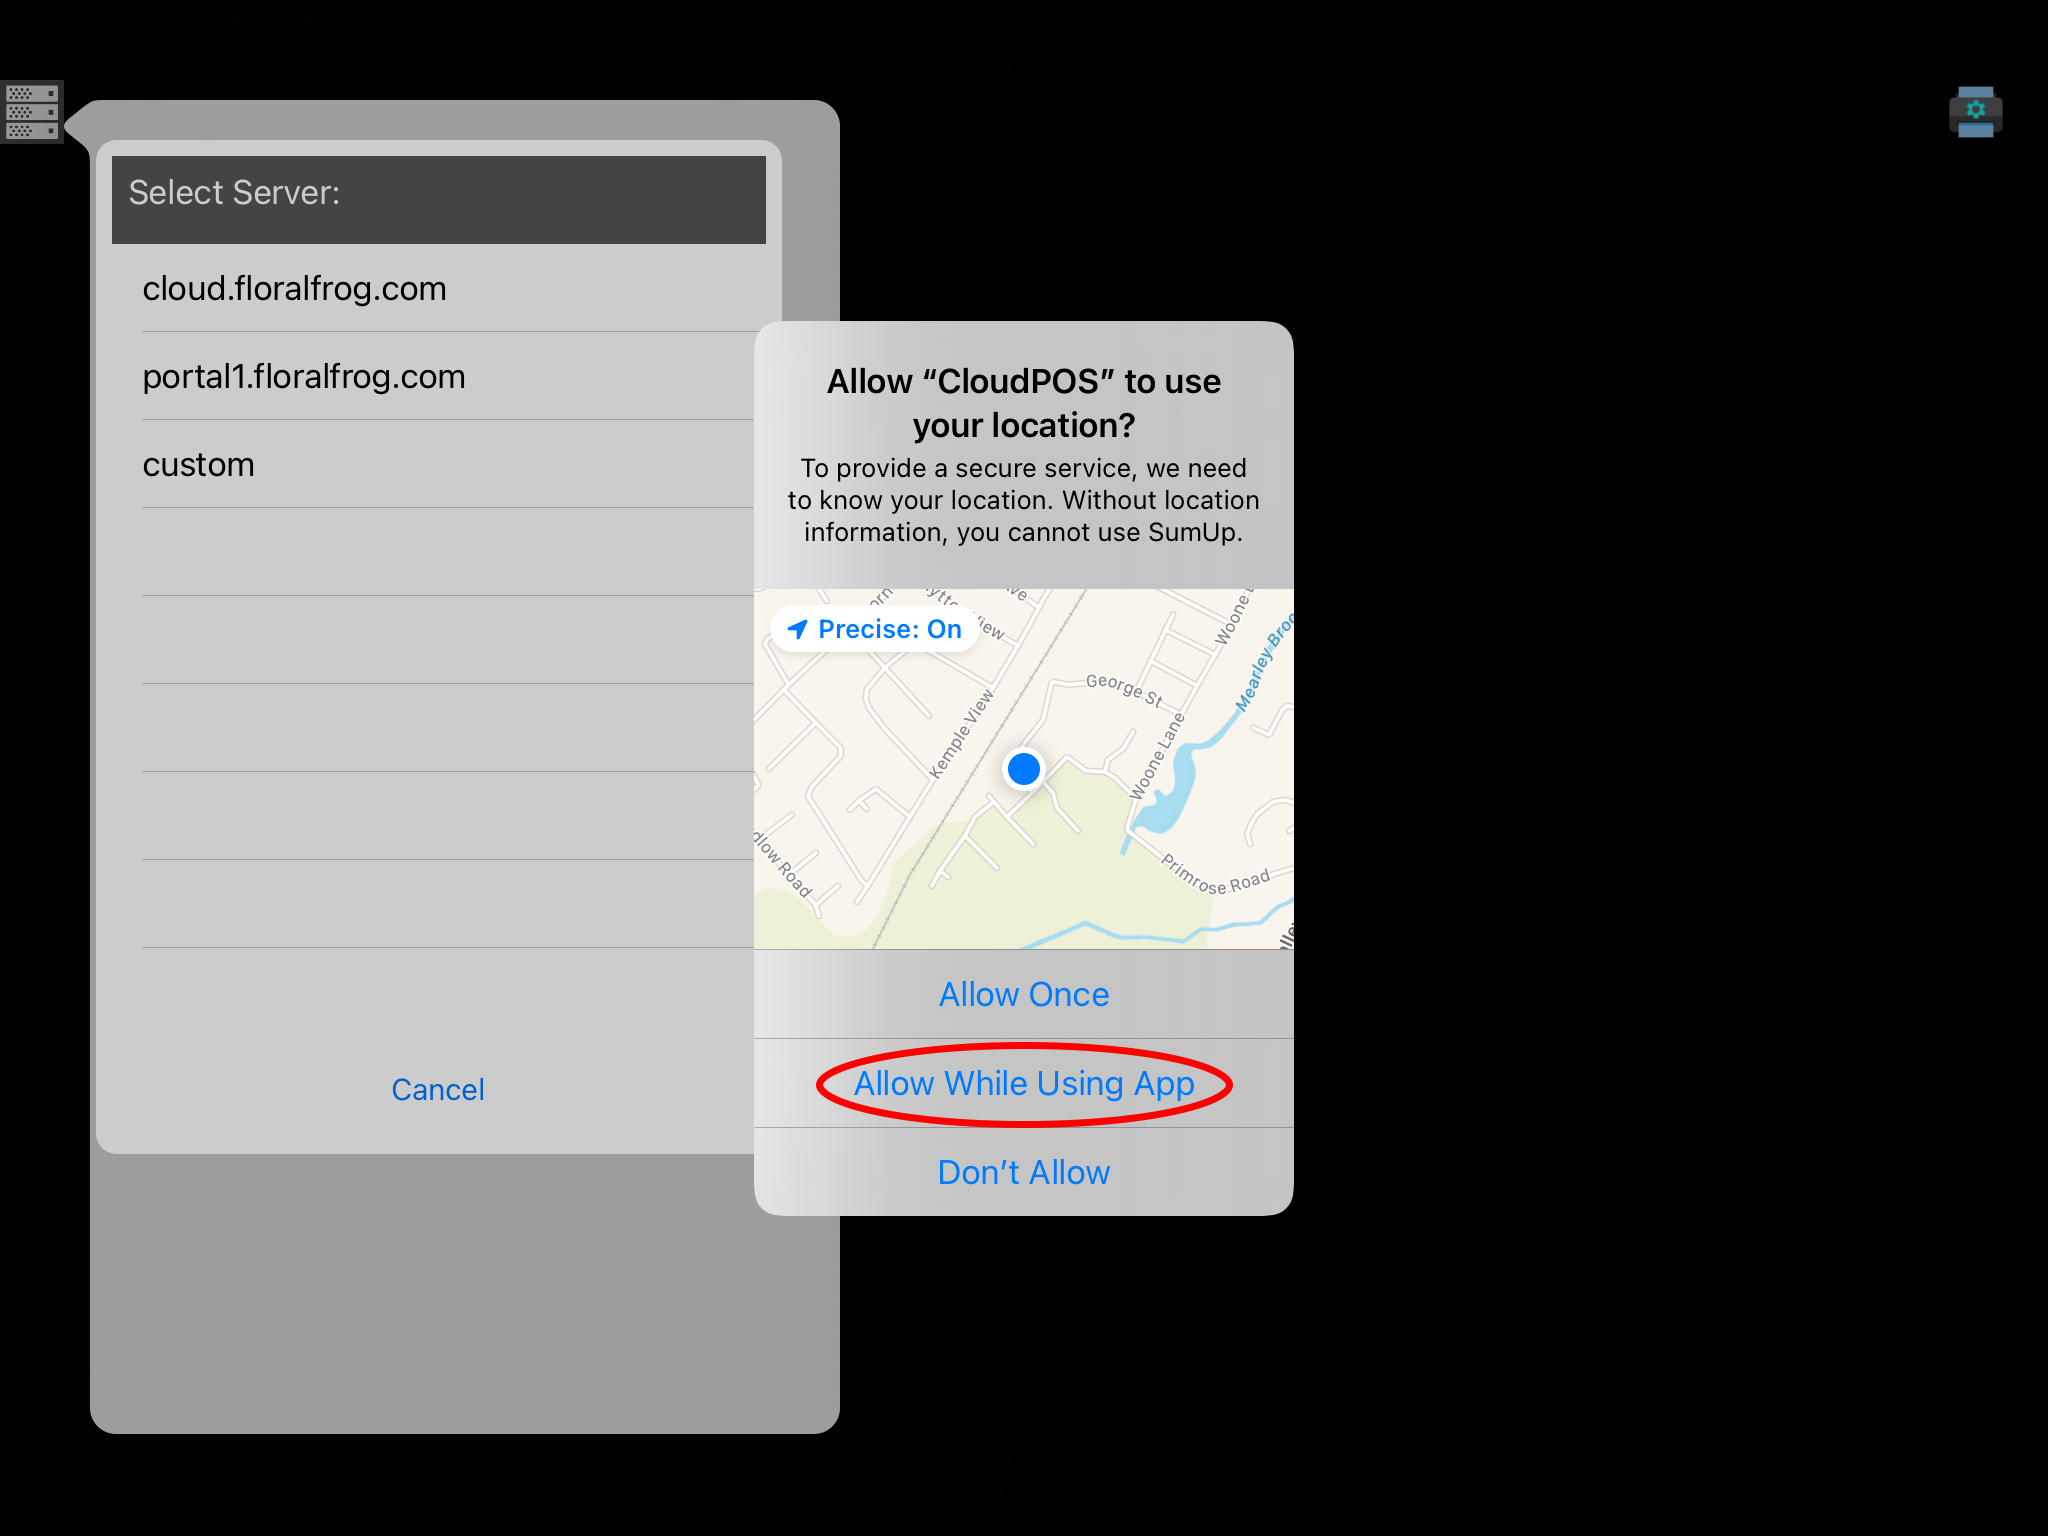
- Click “Allow While Using App” for FrogPOS to access your location. This is to ensure if you opt to process payments with SumUp that your location is known to reduce fraud.
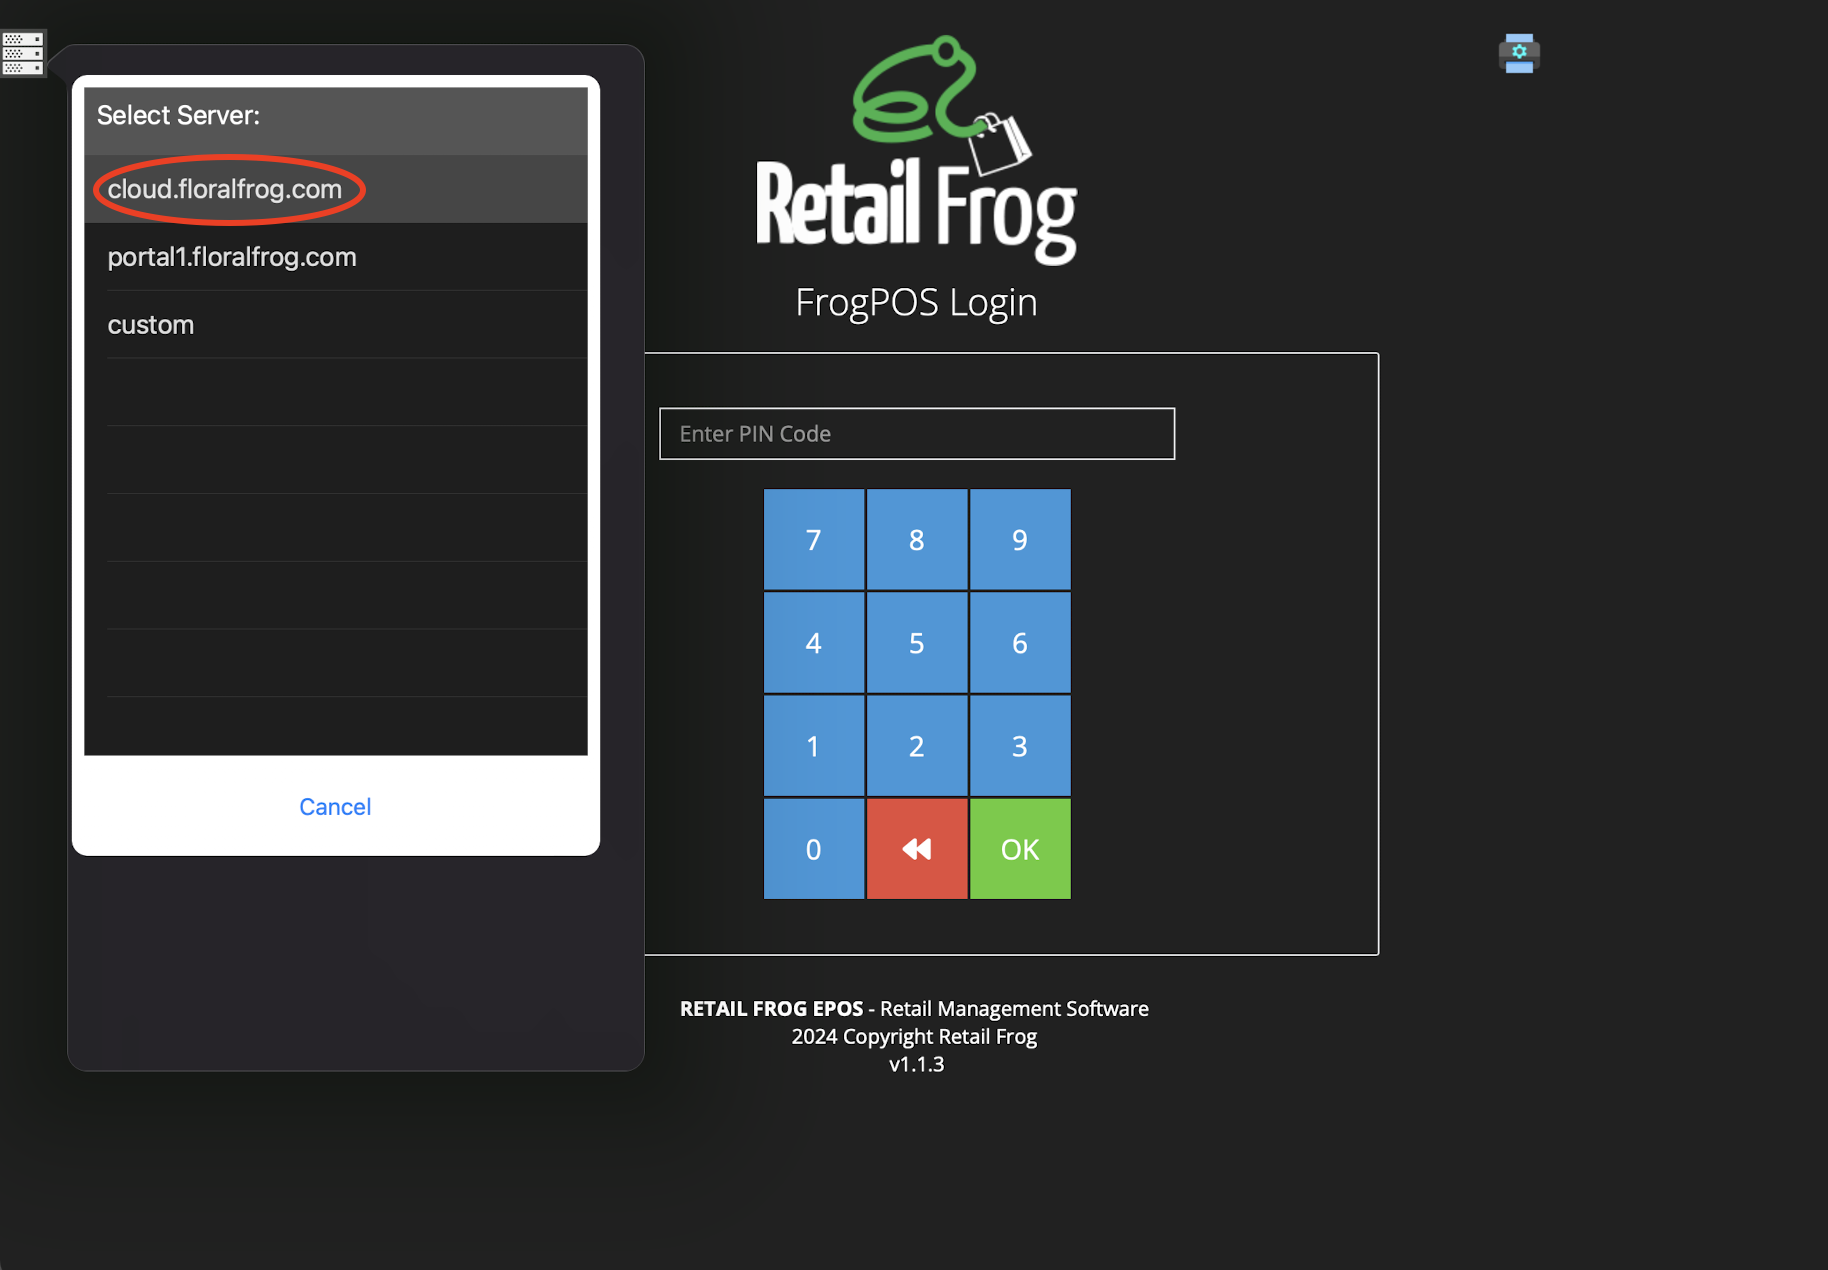
- Then select "cloud.floralfrog.com" as the server.
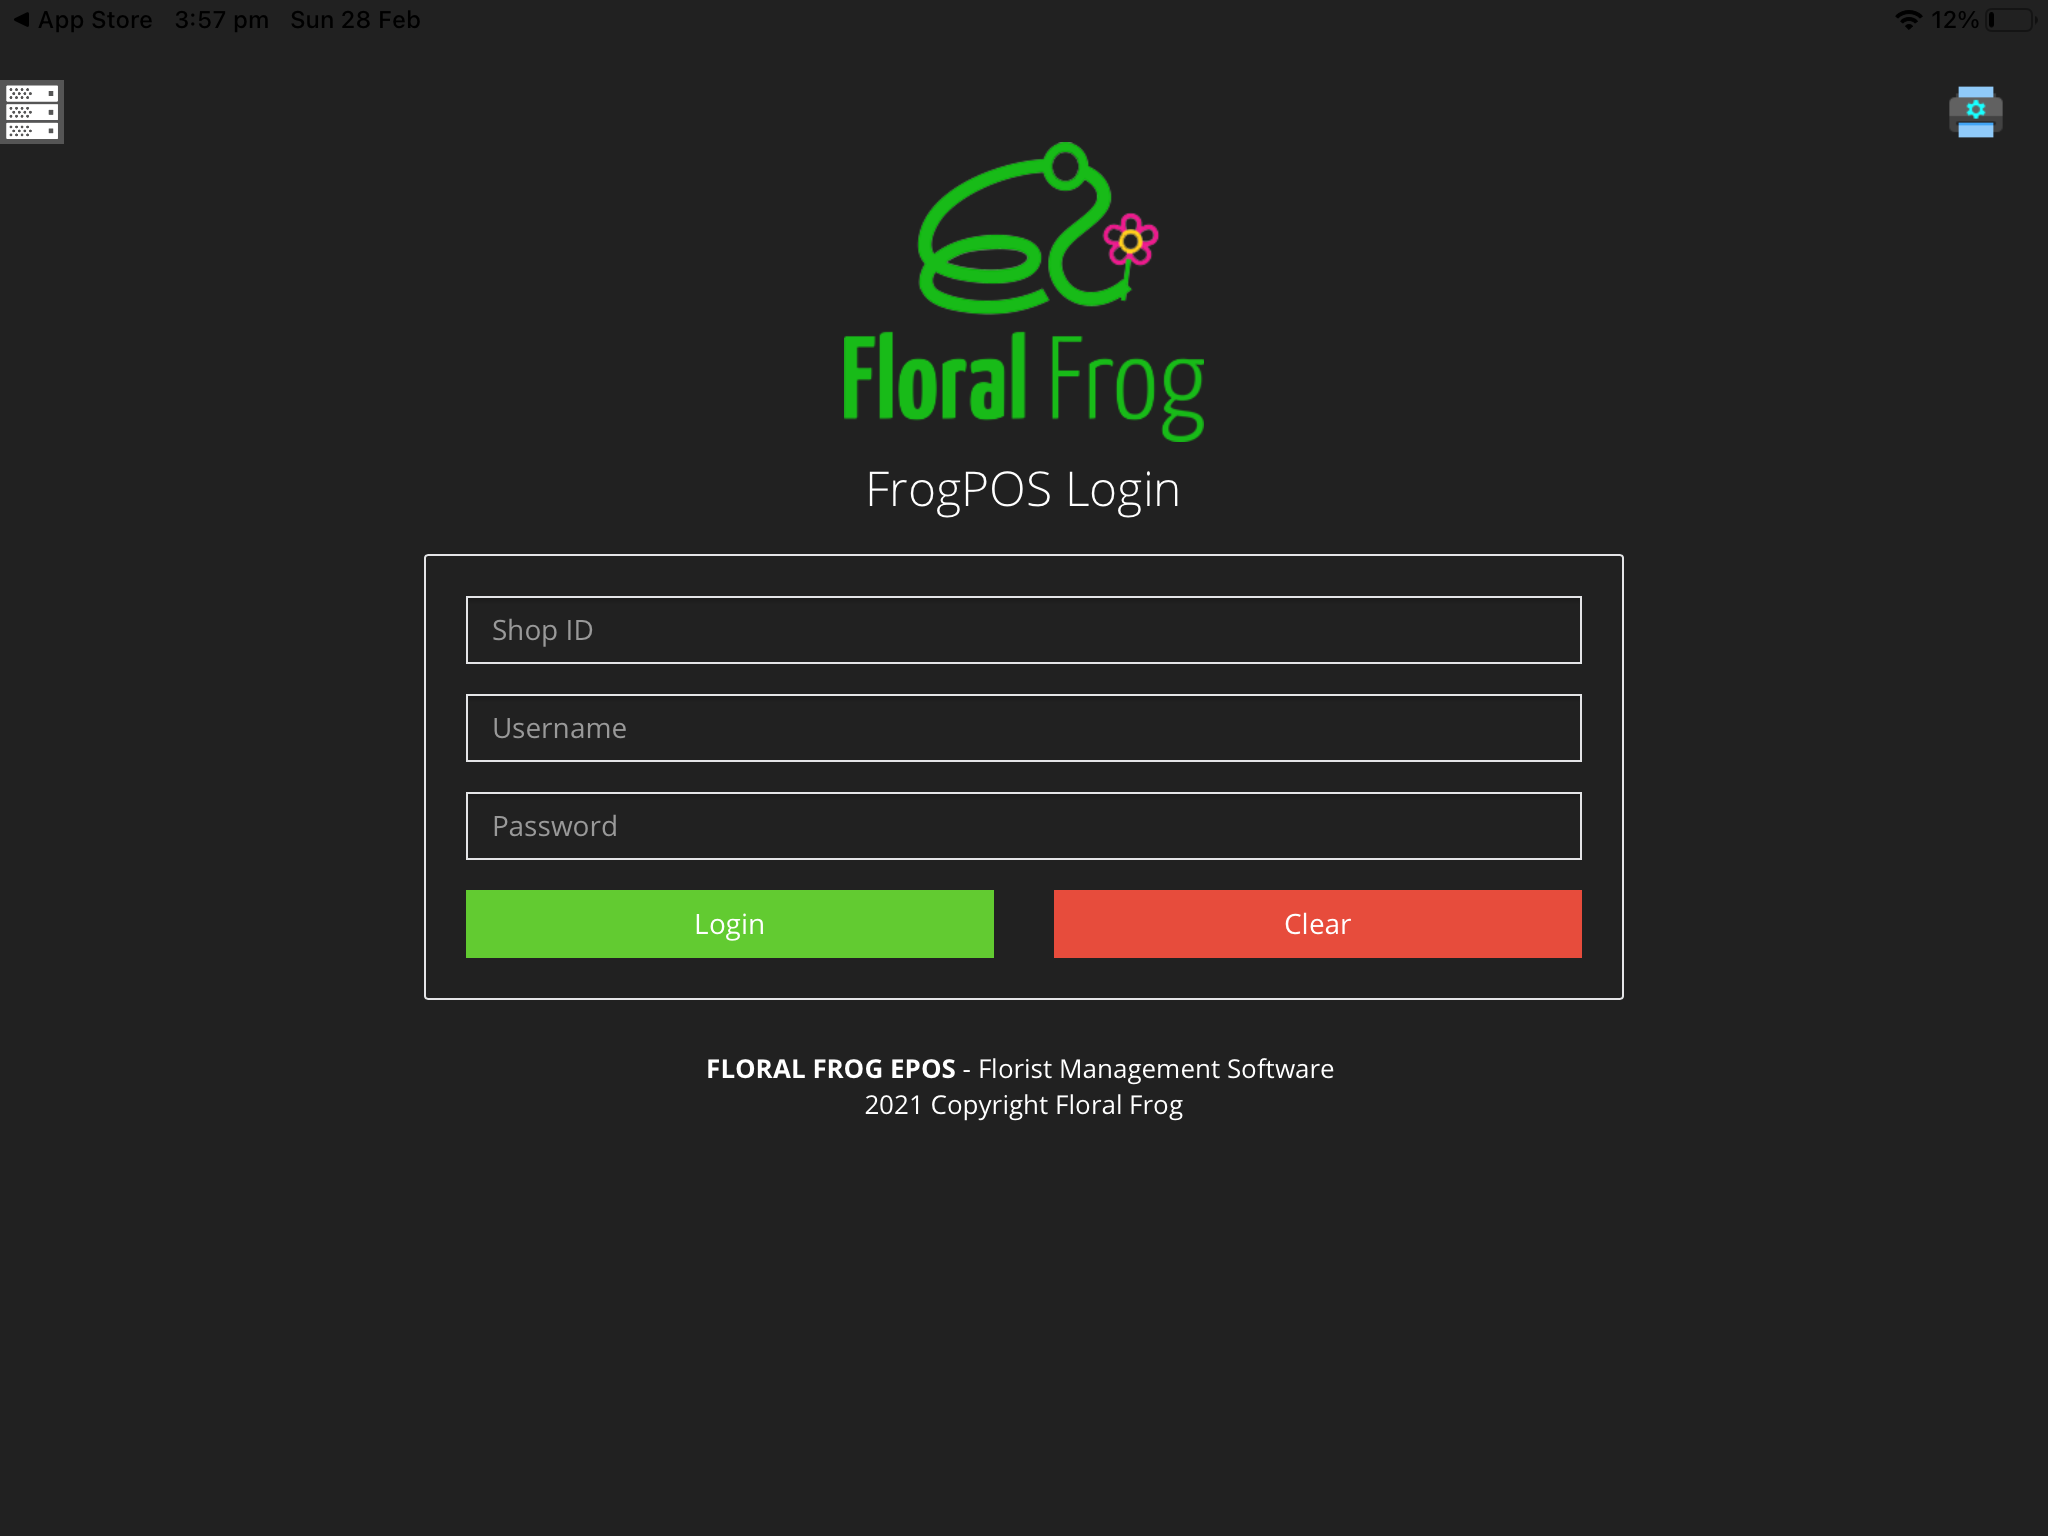
- Enter your “Shop ID”, “Username” and “Password” to link FrogPOS to your Floral Frog account. This is a onetime requirement.
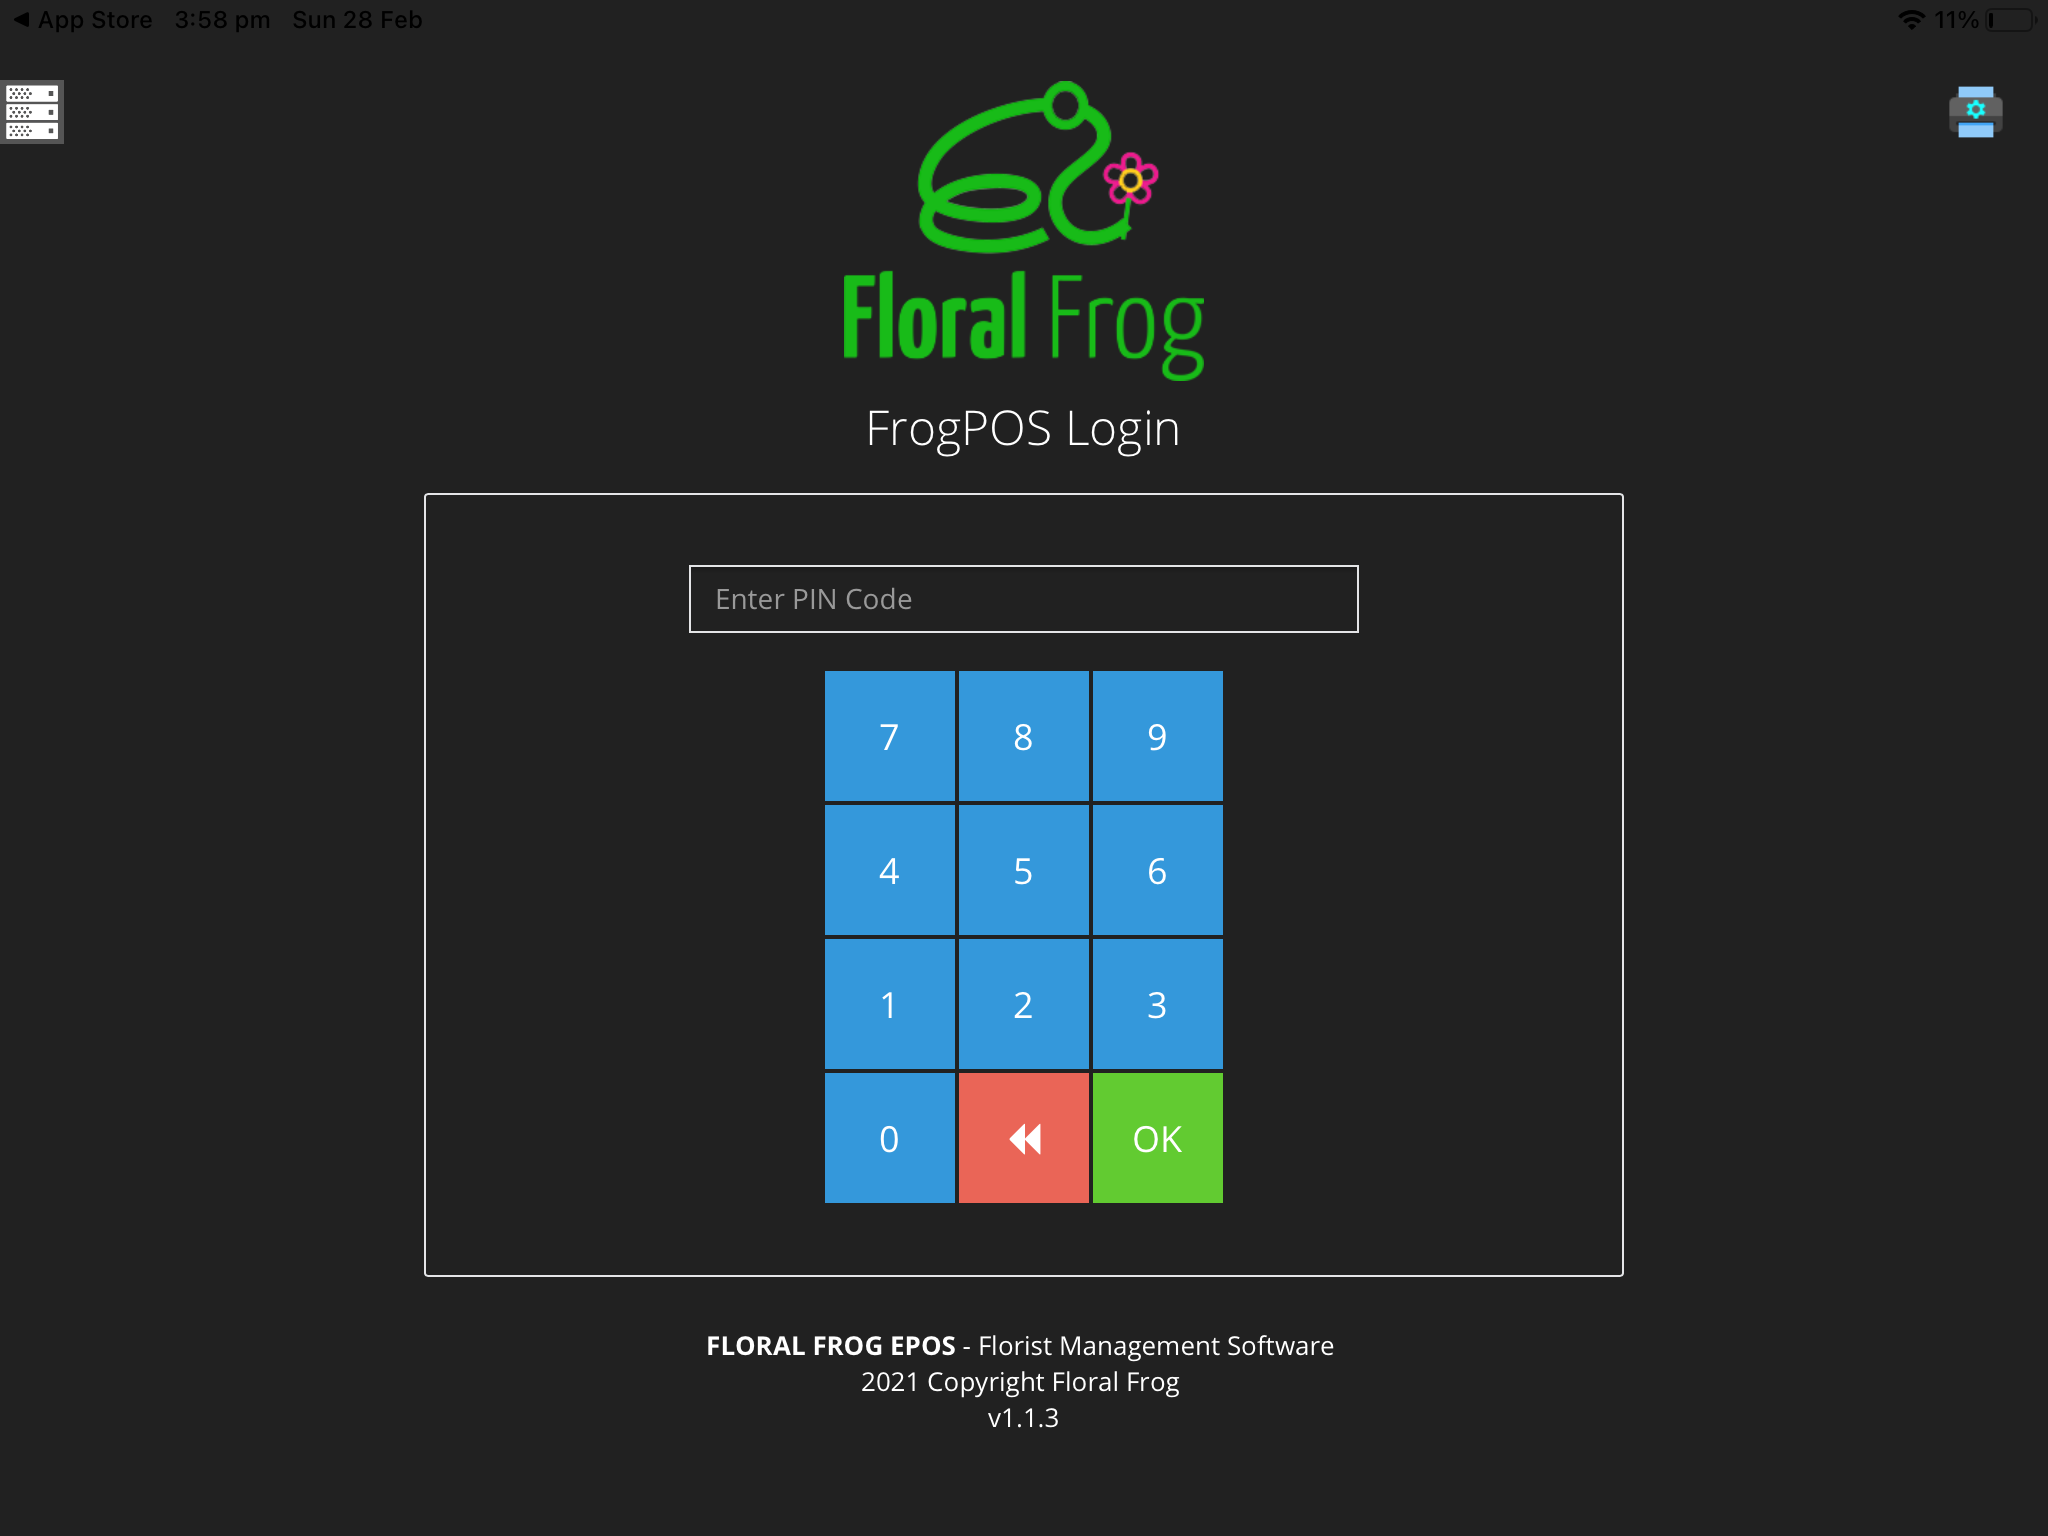
- Enter your unique PIN to access FrogPOS.
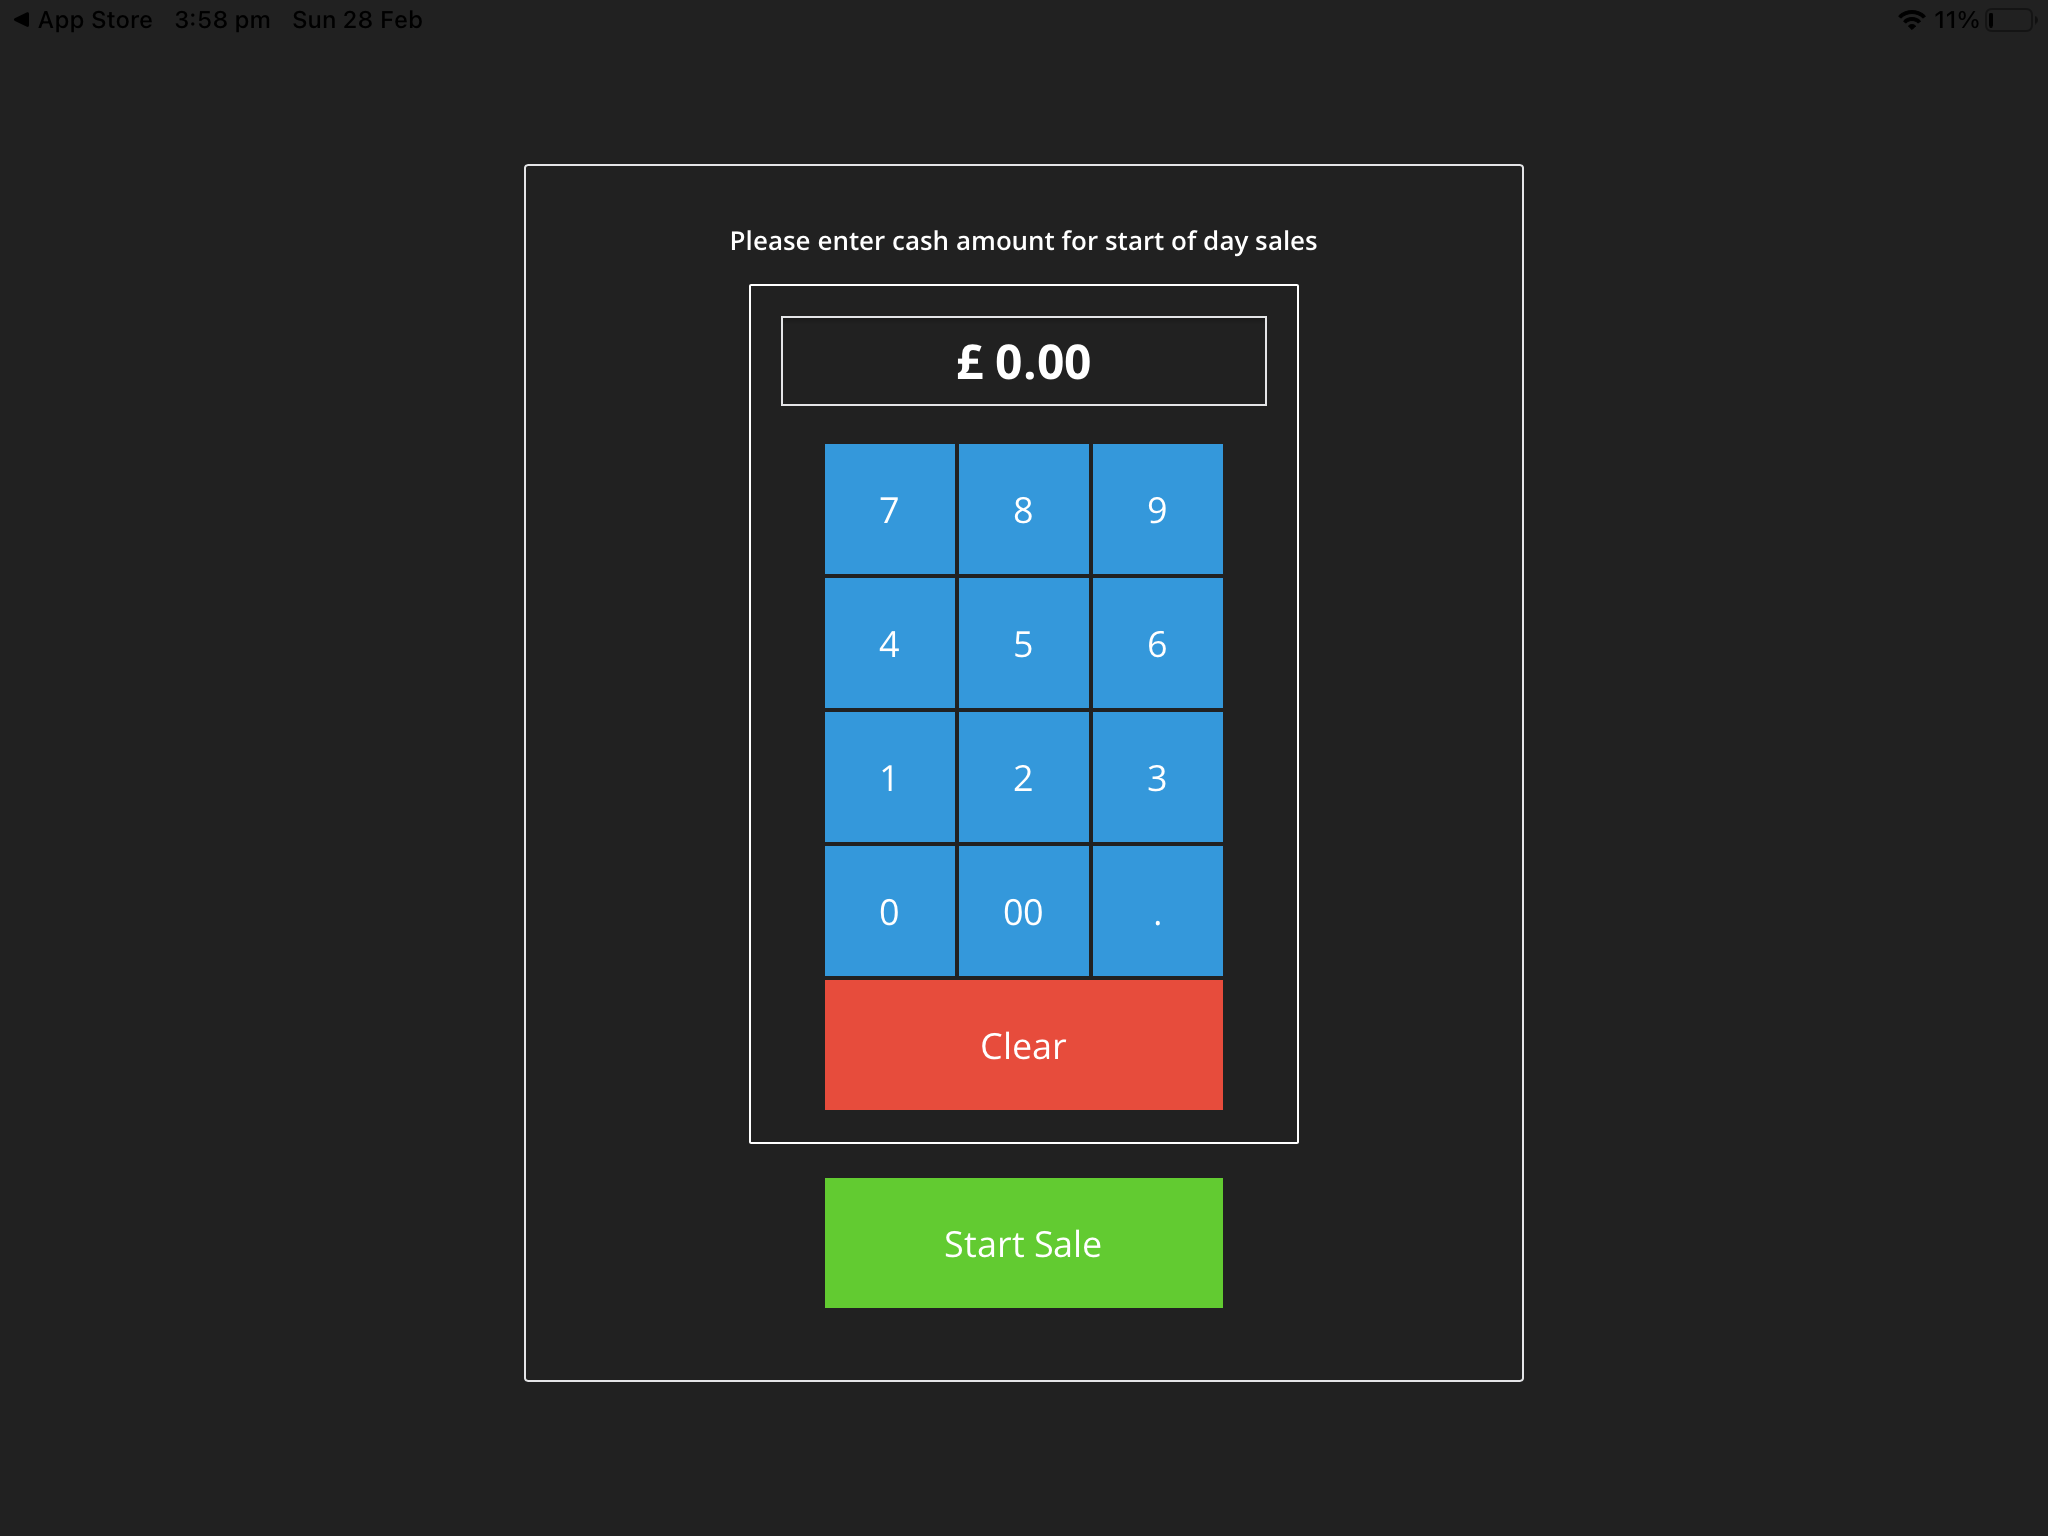
- The first login of each day will ask you to enter your start of day sales, this is to track the amount of cash inside your cash drawer, to assist with end of day takings. For now, you can just select 0 and press "Start Sale".
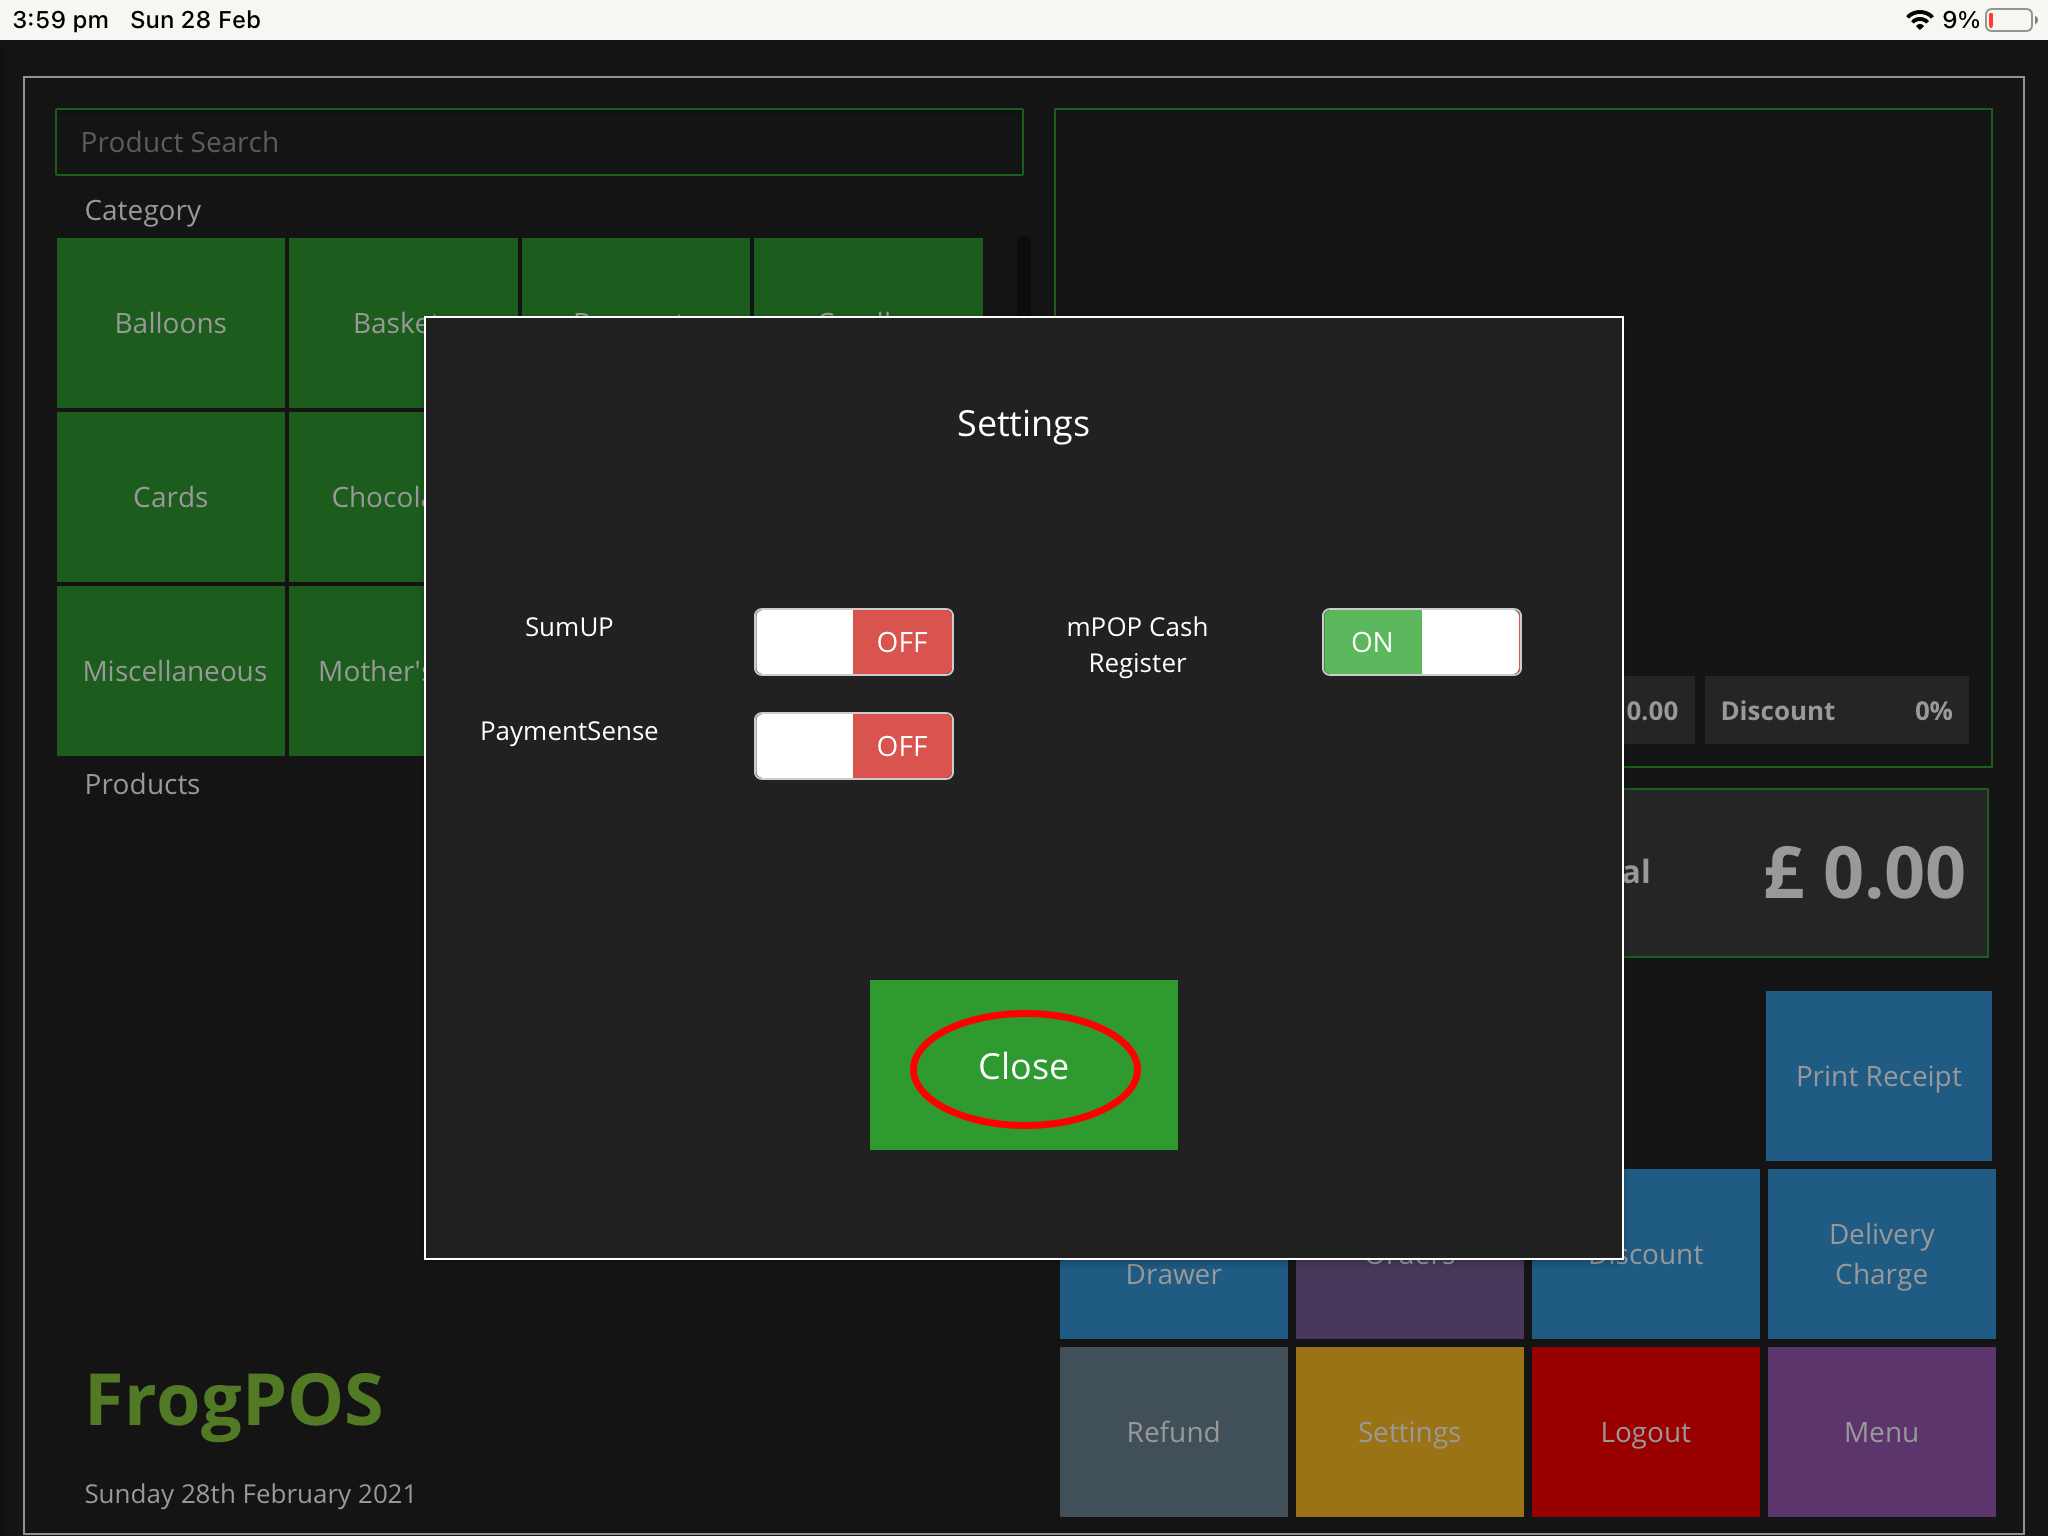
Connect FrogPOS to mPOP
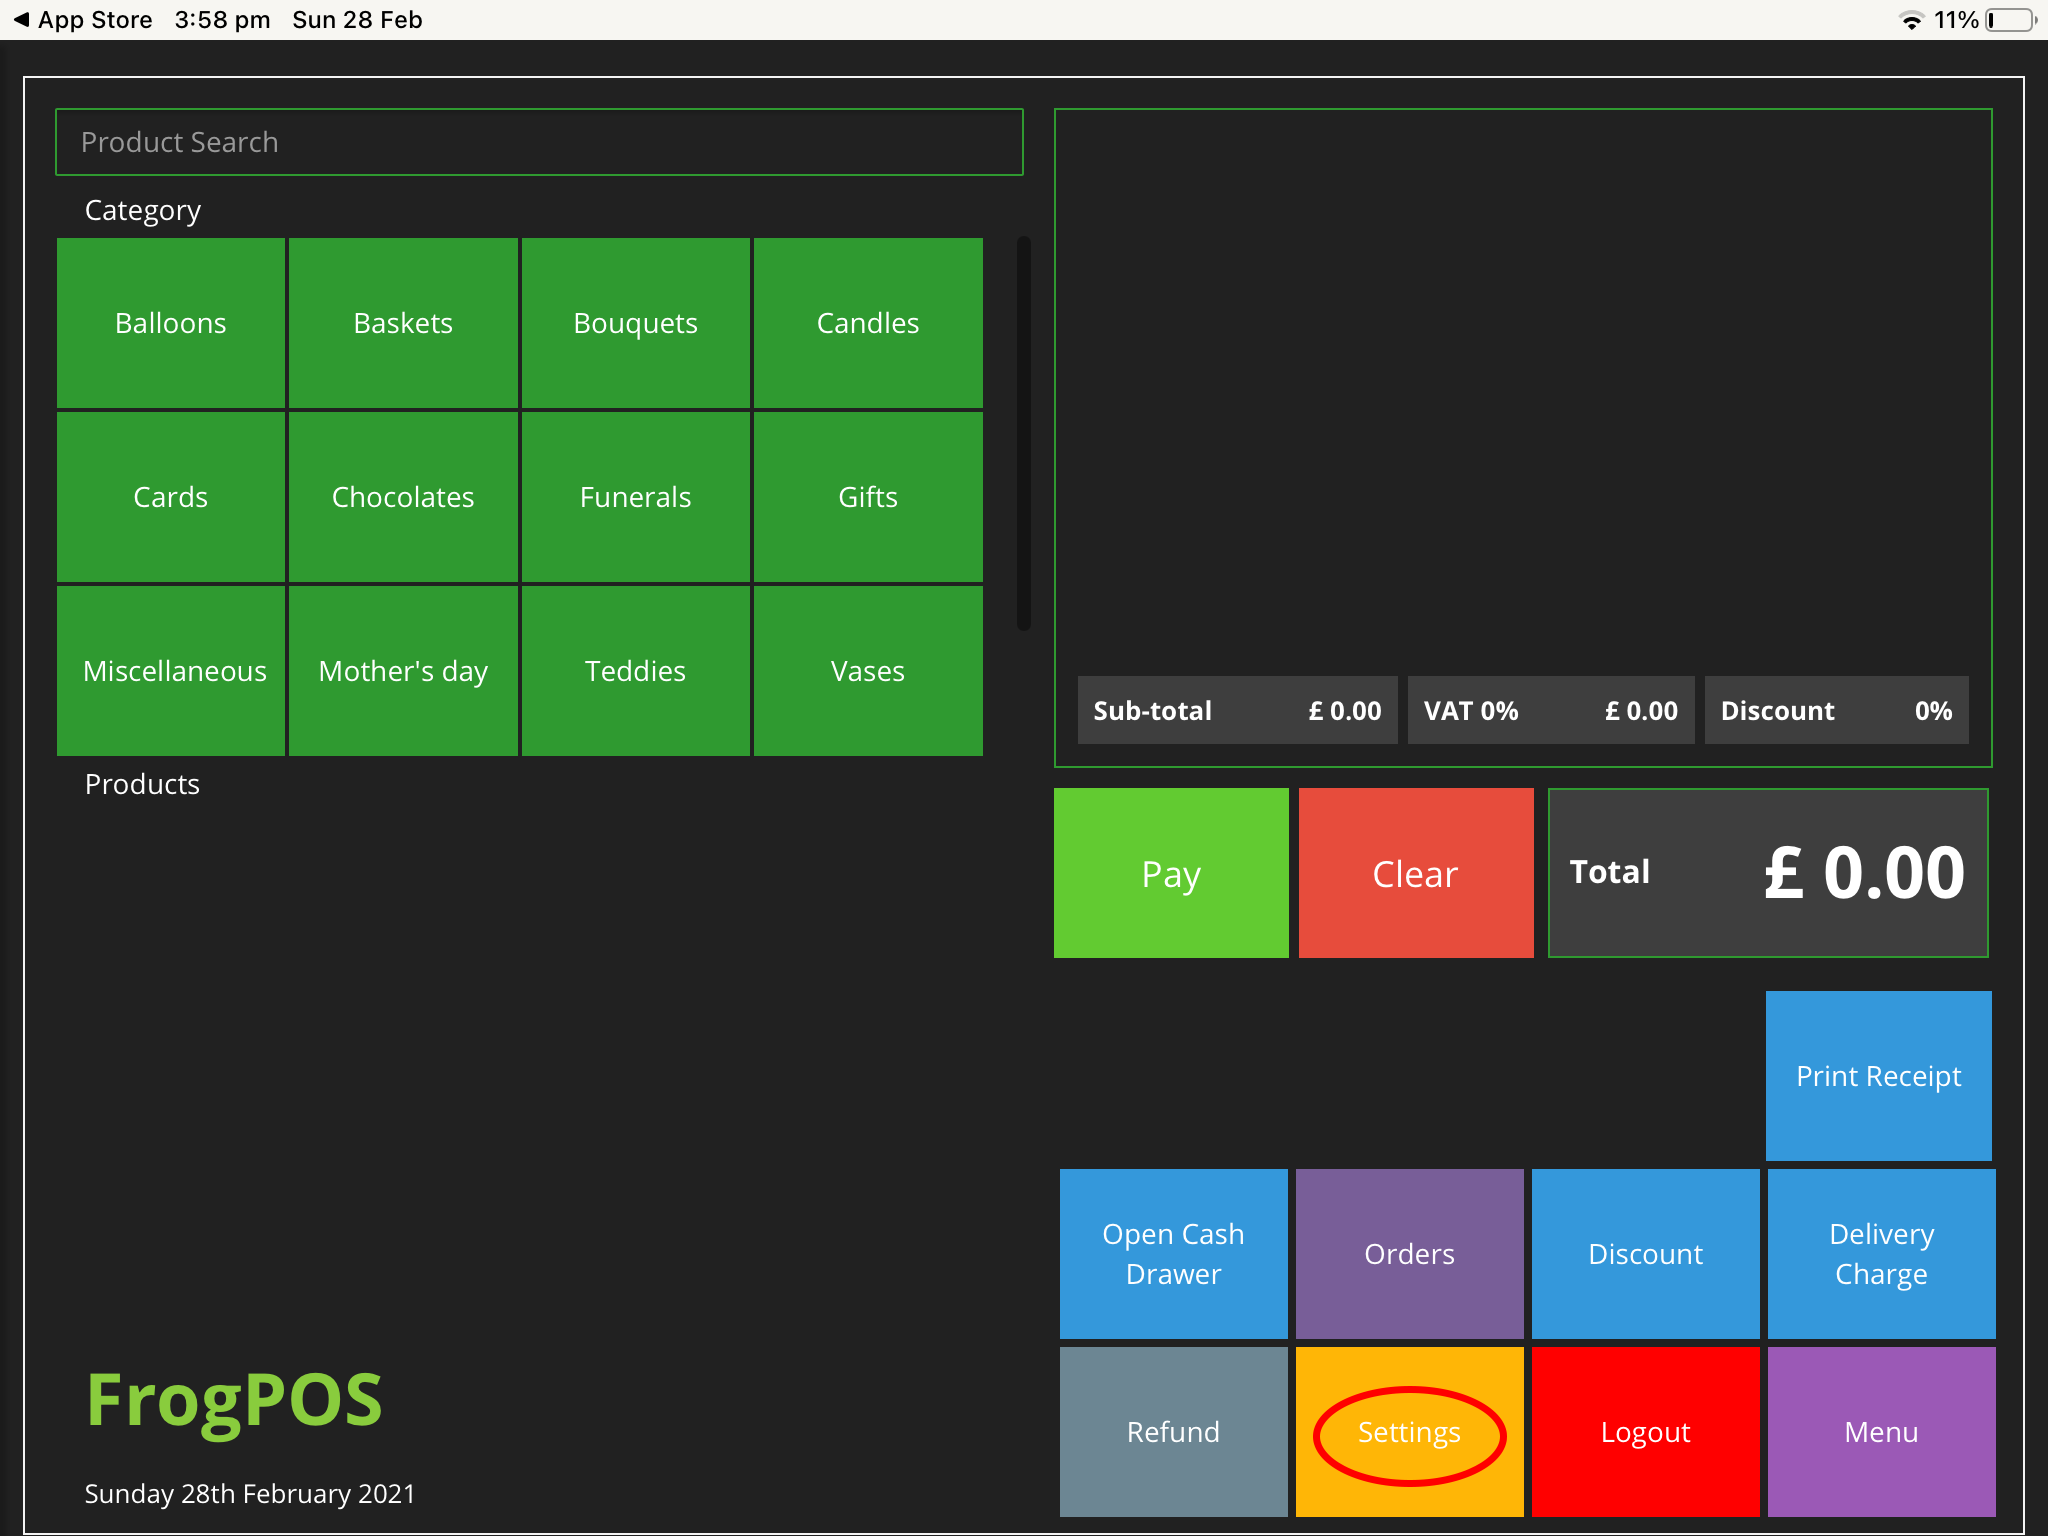
- Log into FrogPOS and click on “Settings”
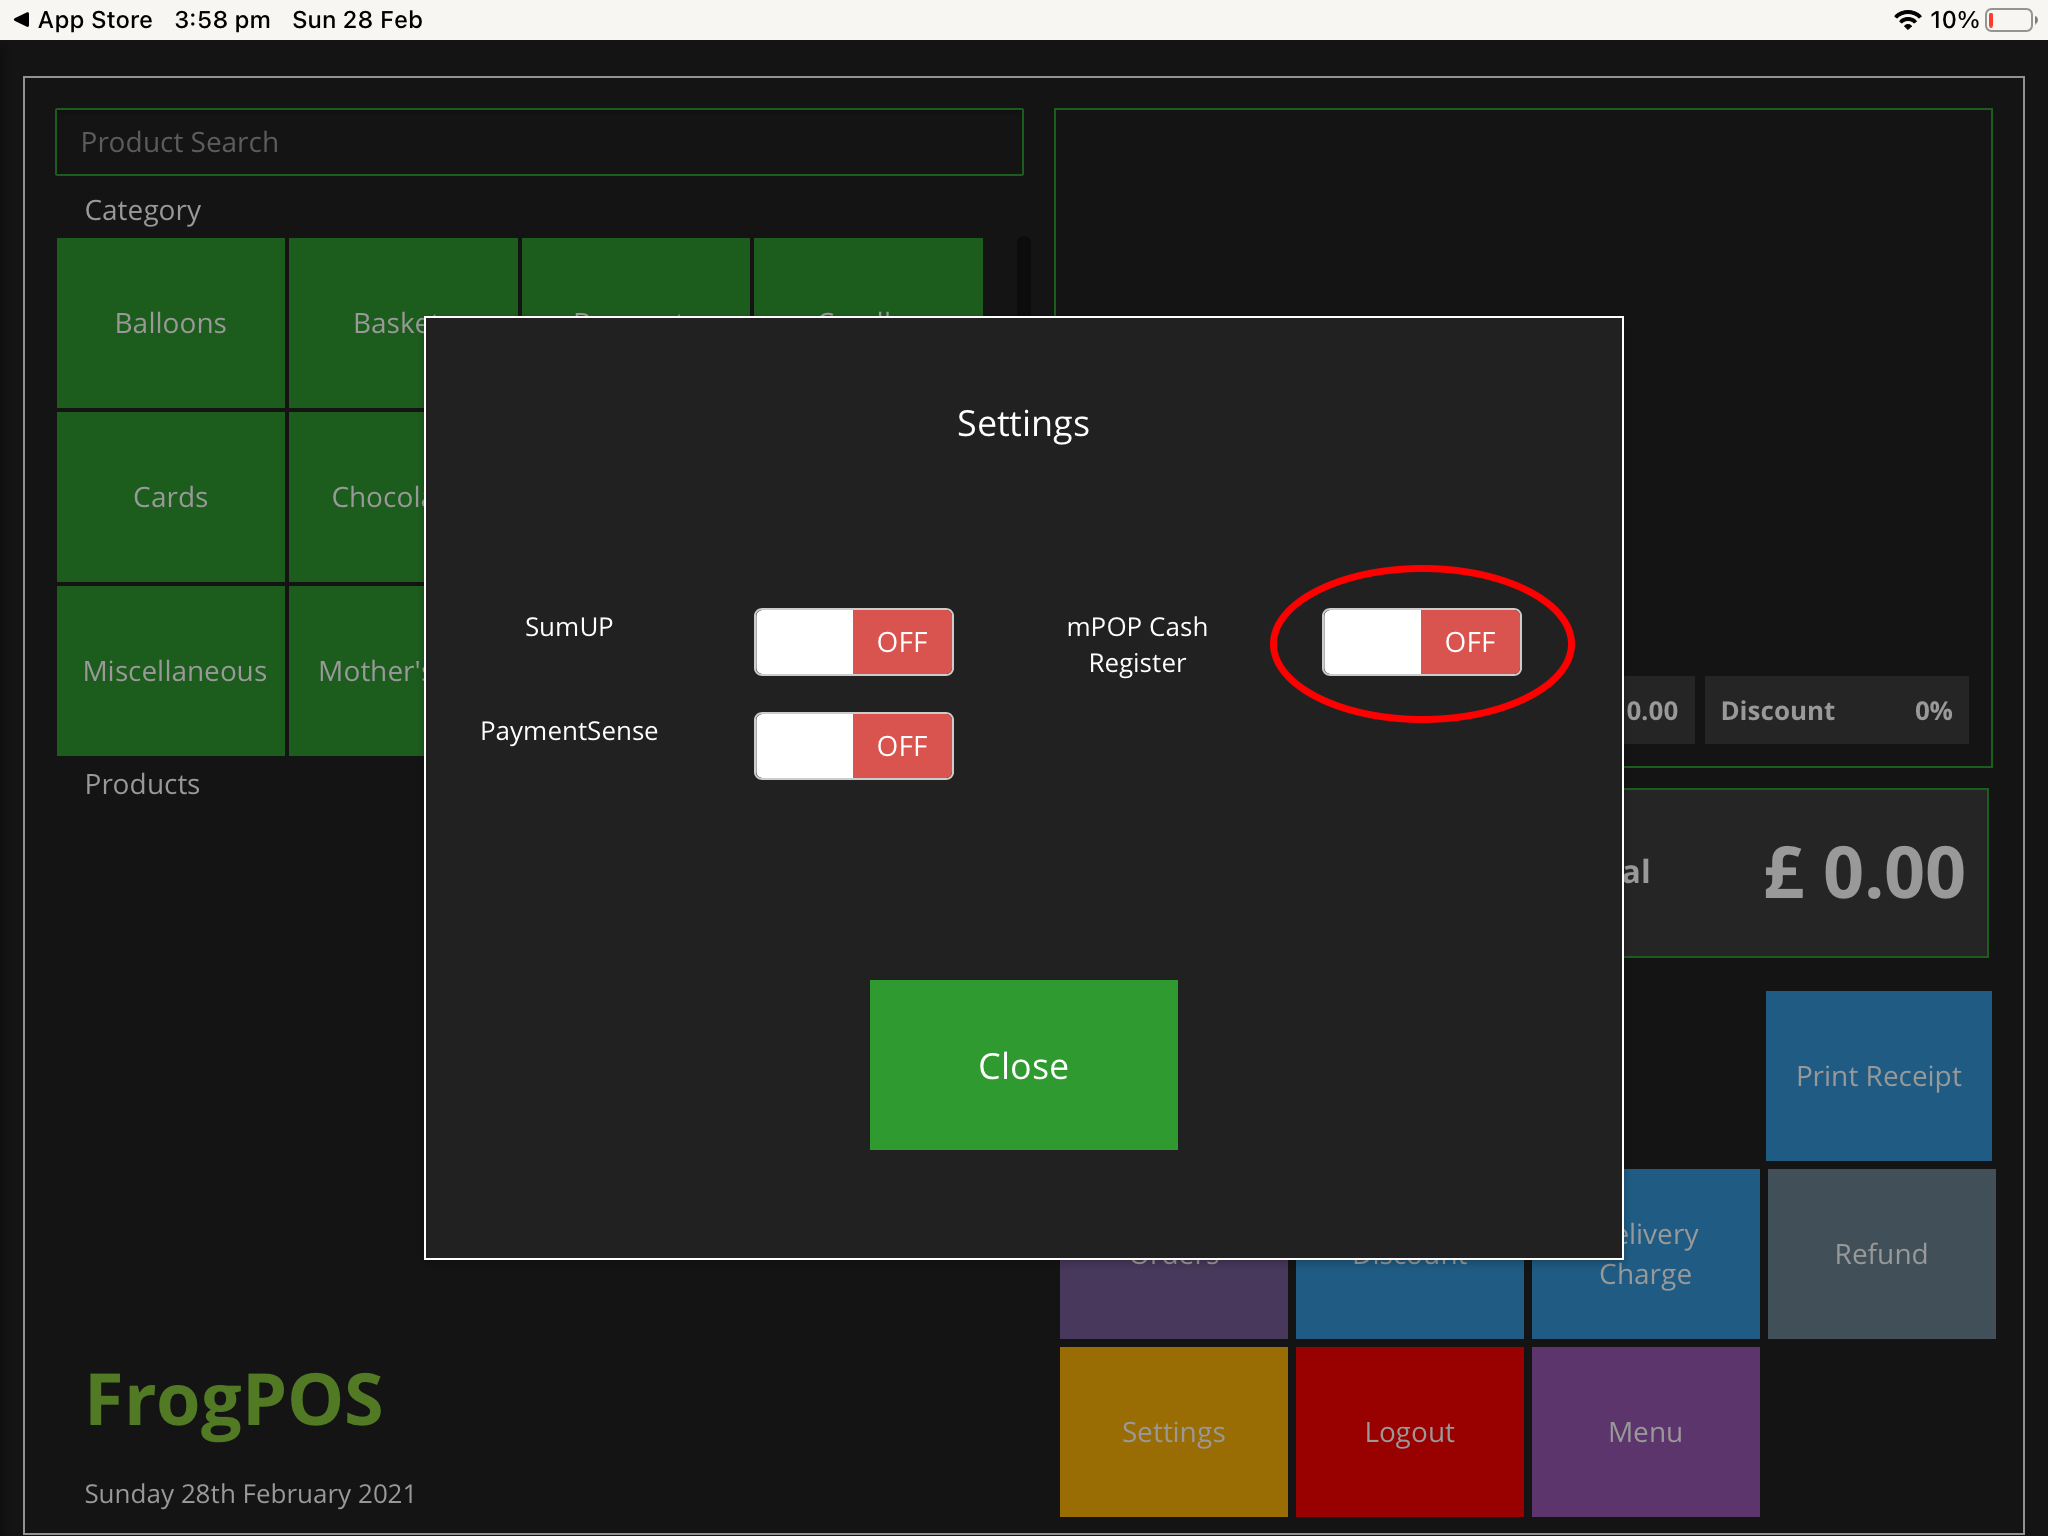
- Switch mPOP Cash Register to “On”
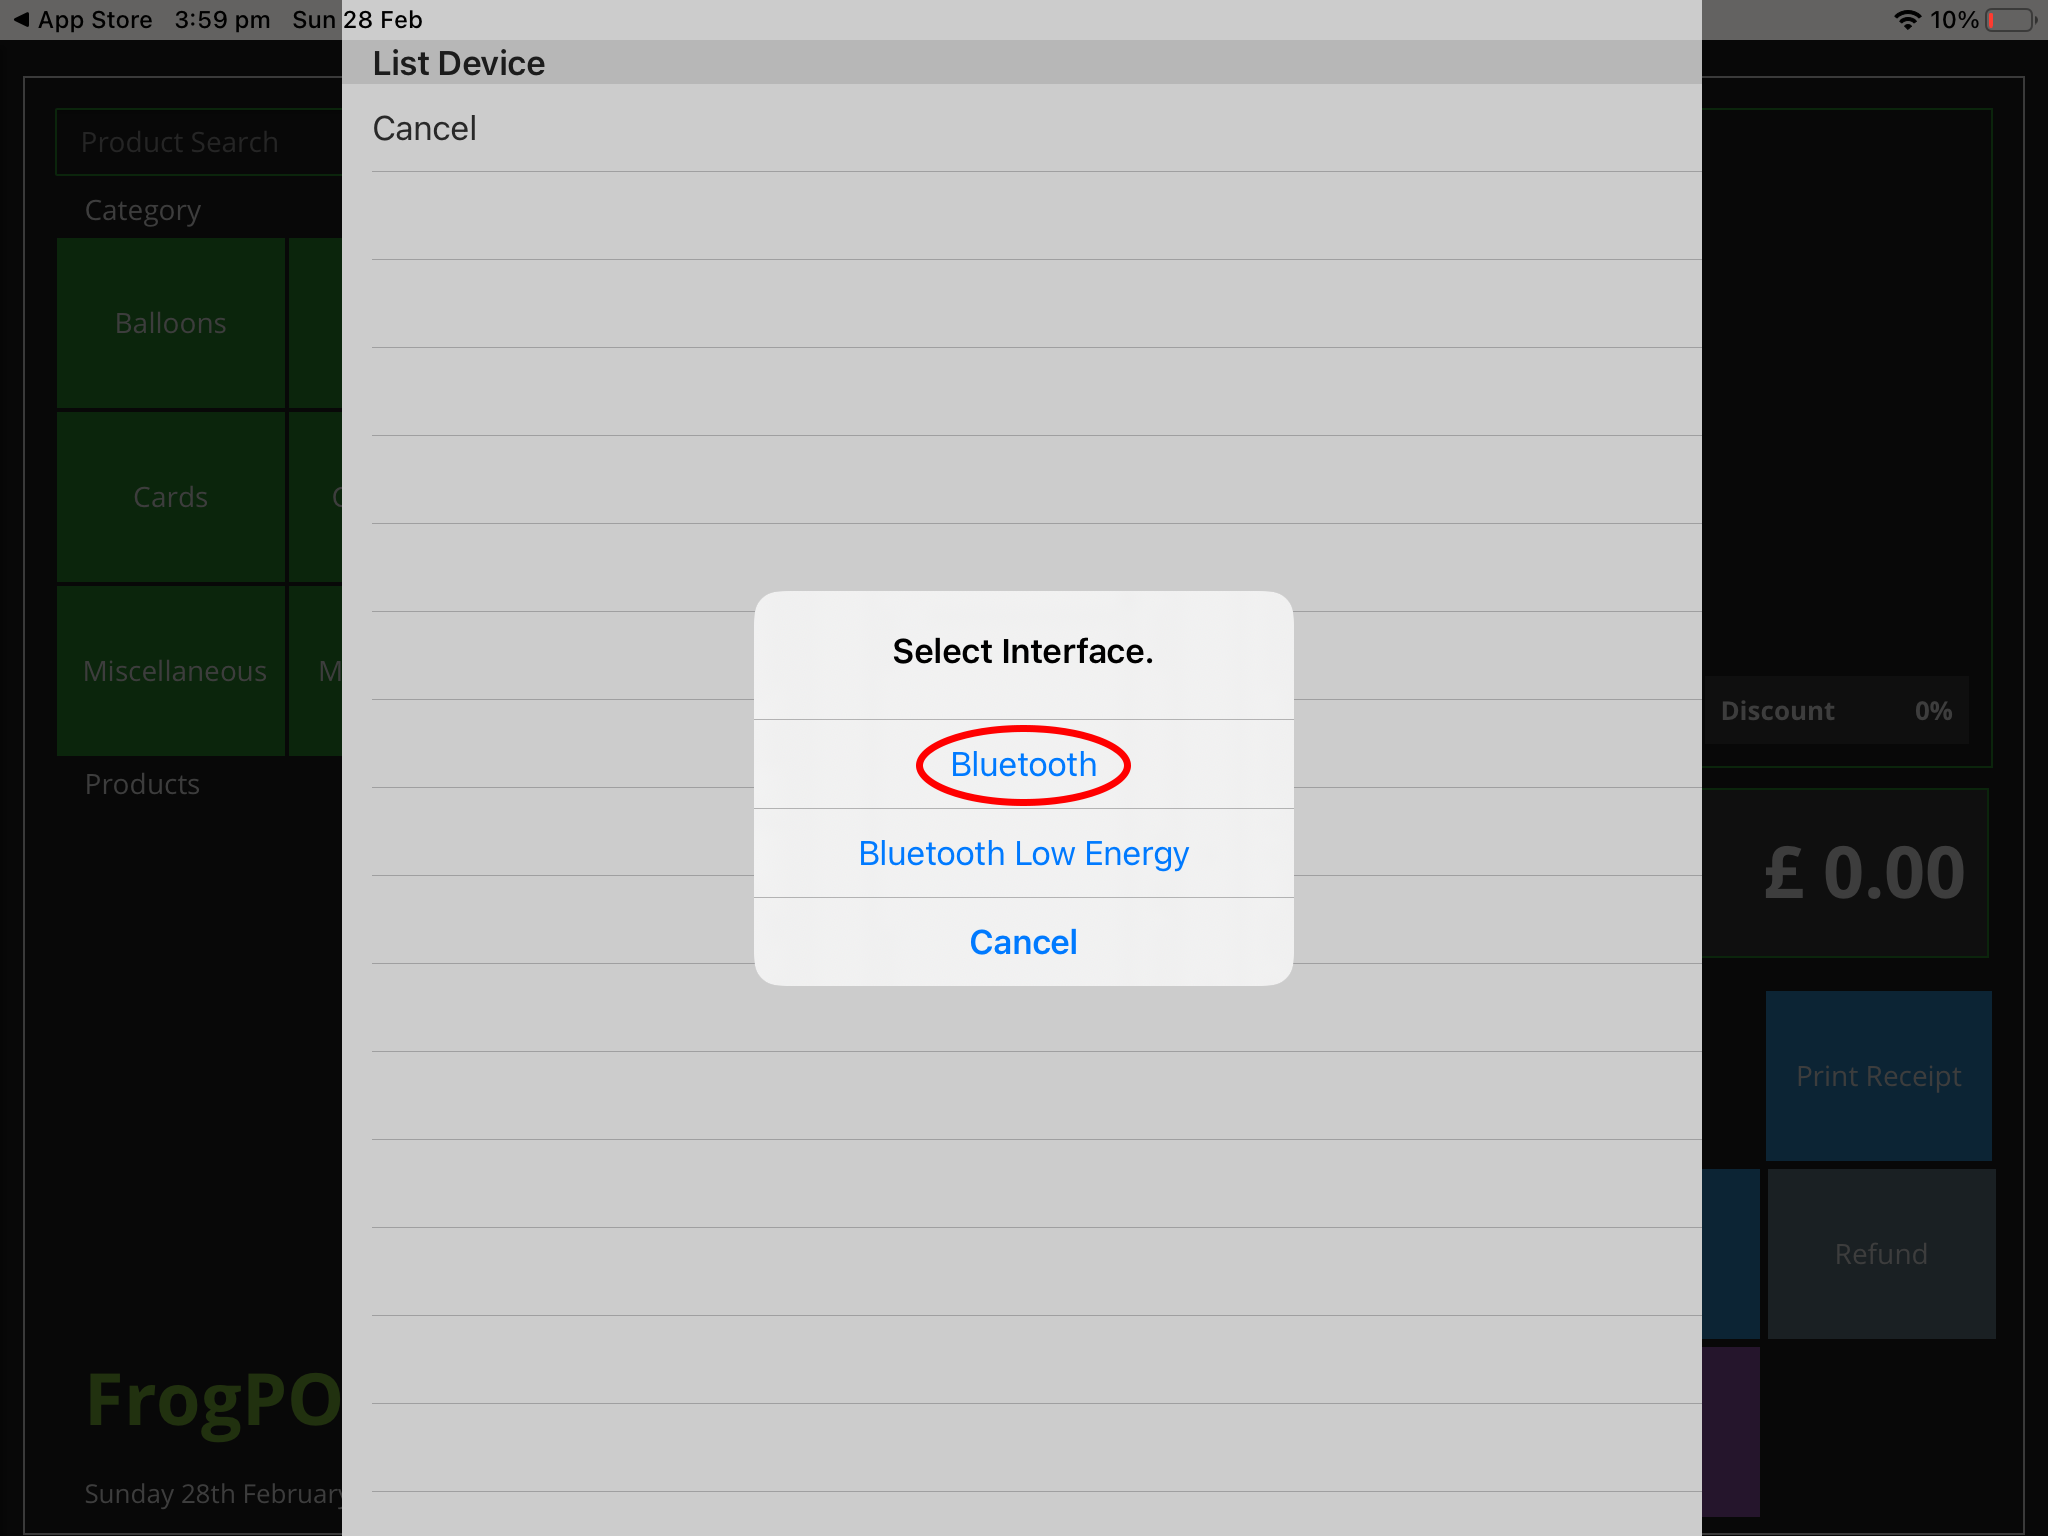
- Select Bluetooth interface
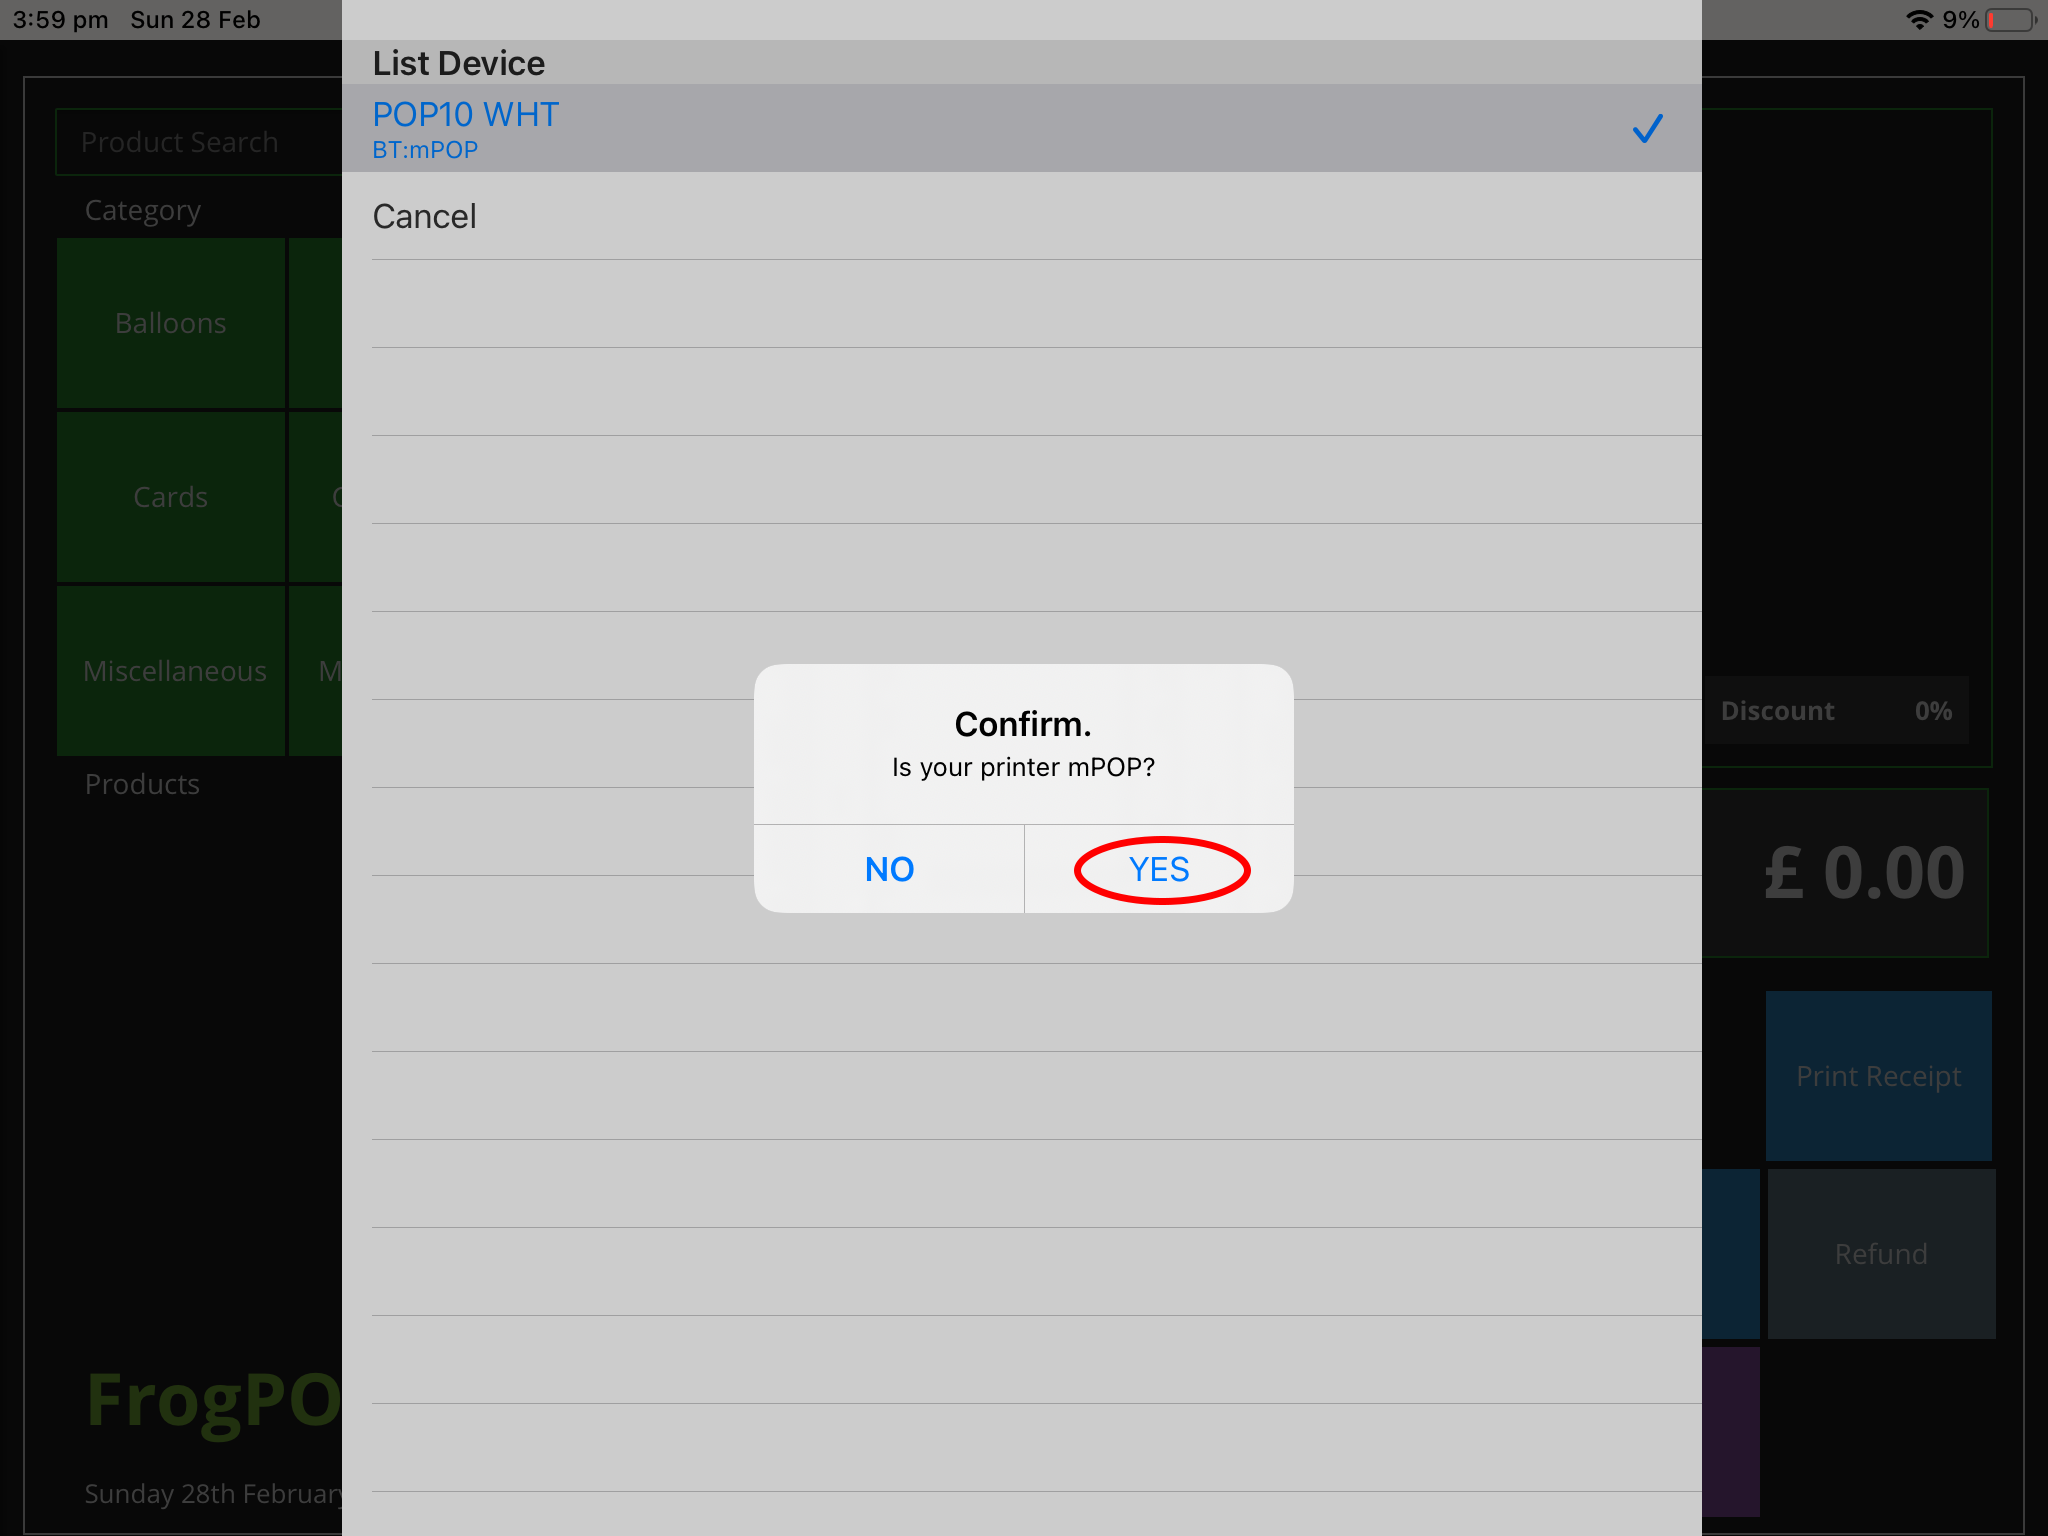
- Select “POP10 WHT BT:mPoP”

- Click “Yes” to confirm your printer is mPOP
- And finally, close “Settings” in FrogPOS to complete connectivity.