Adding Categories
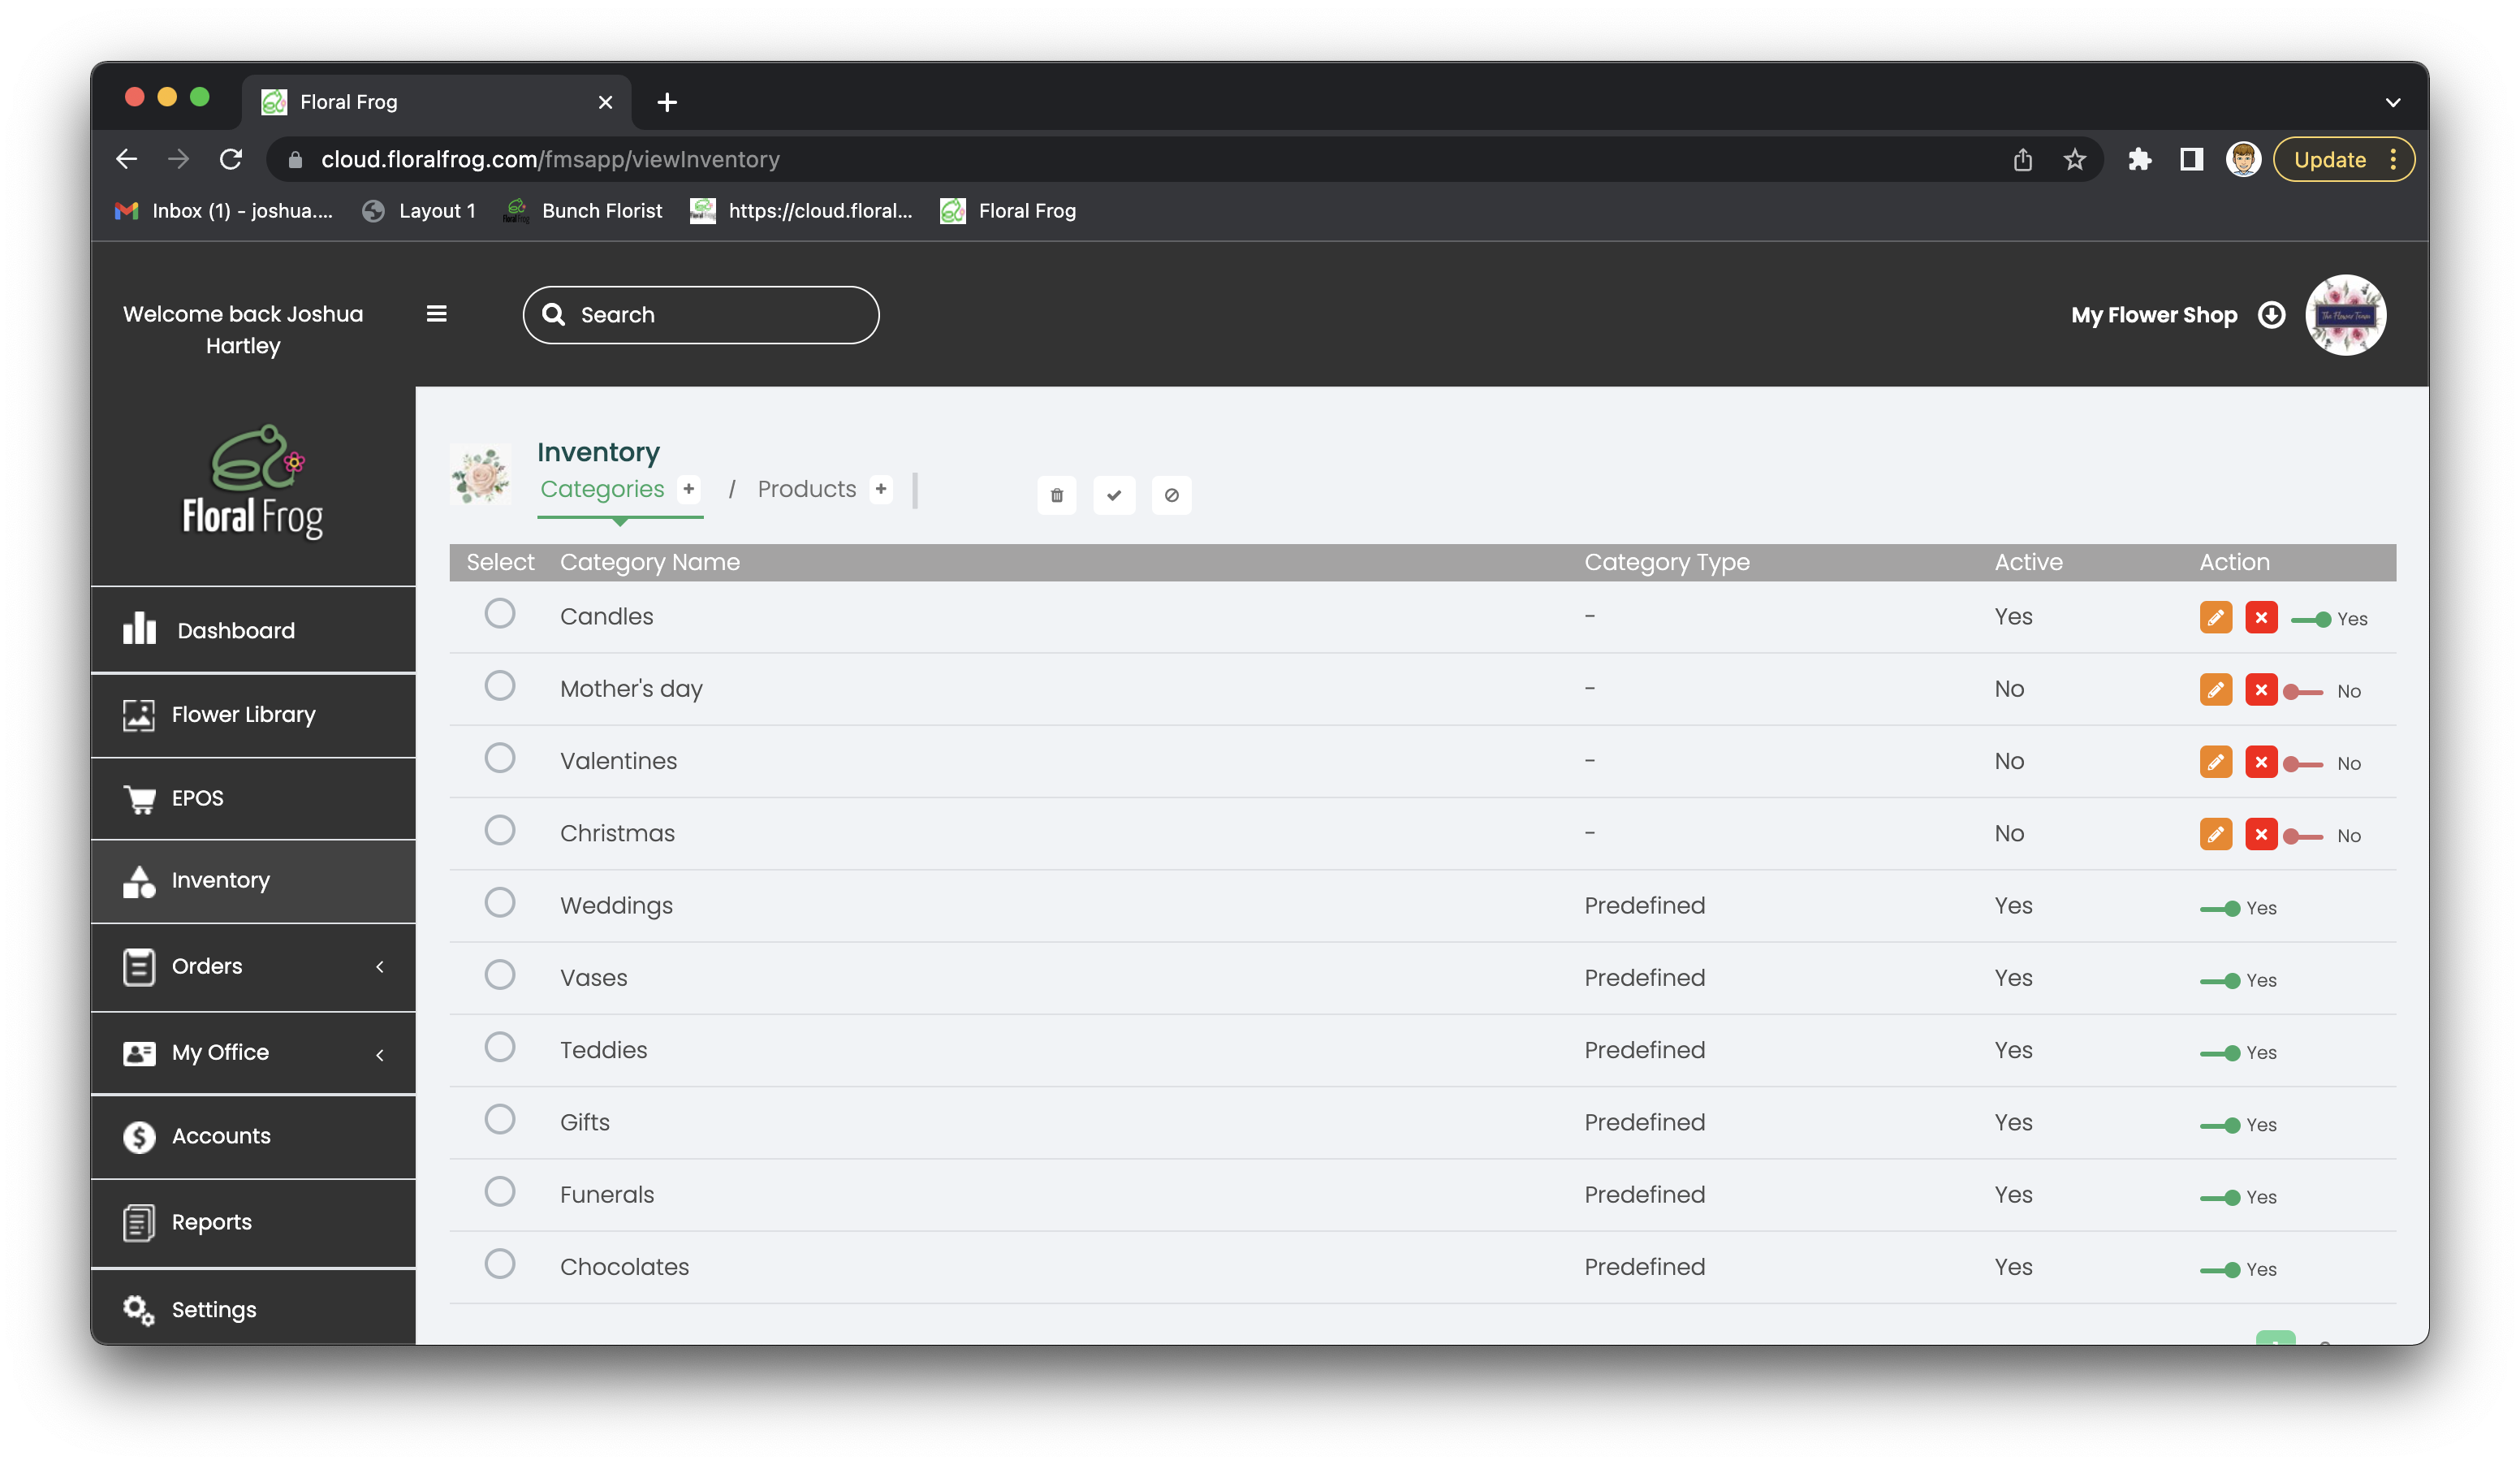
The software comes with some predefined categories that you can use (these can be seen in the image below). However, if you do not wish to use these then you can click the “Deactivate Category” button.
To manage your categories, login to the back office of the software, and on the left hand menu navigate to “Inventory”. From here you can add, edit, or remove as many categories to suit you.
Note: Keep Category names to less than 14 characters to ensure they fit on the button correctly.
Each category also come with it’s own “Custom” product built in. This means that when you are selecting your products for a sale on the FrogPOS, you can use the “Custom” button for any miscellaneous or bespoke products you may have and enter it’s value.
Adding Products
To add a product, login to the back office and using the left hand menu, navigate to “Inventory” and then select the “Products” tab at the top of the page. From here you can click the Plus symbol button to add a new product and a screen will appear as shown below.
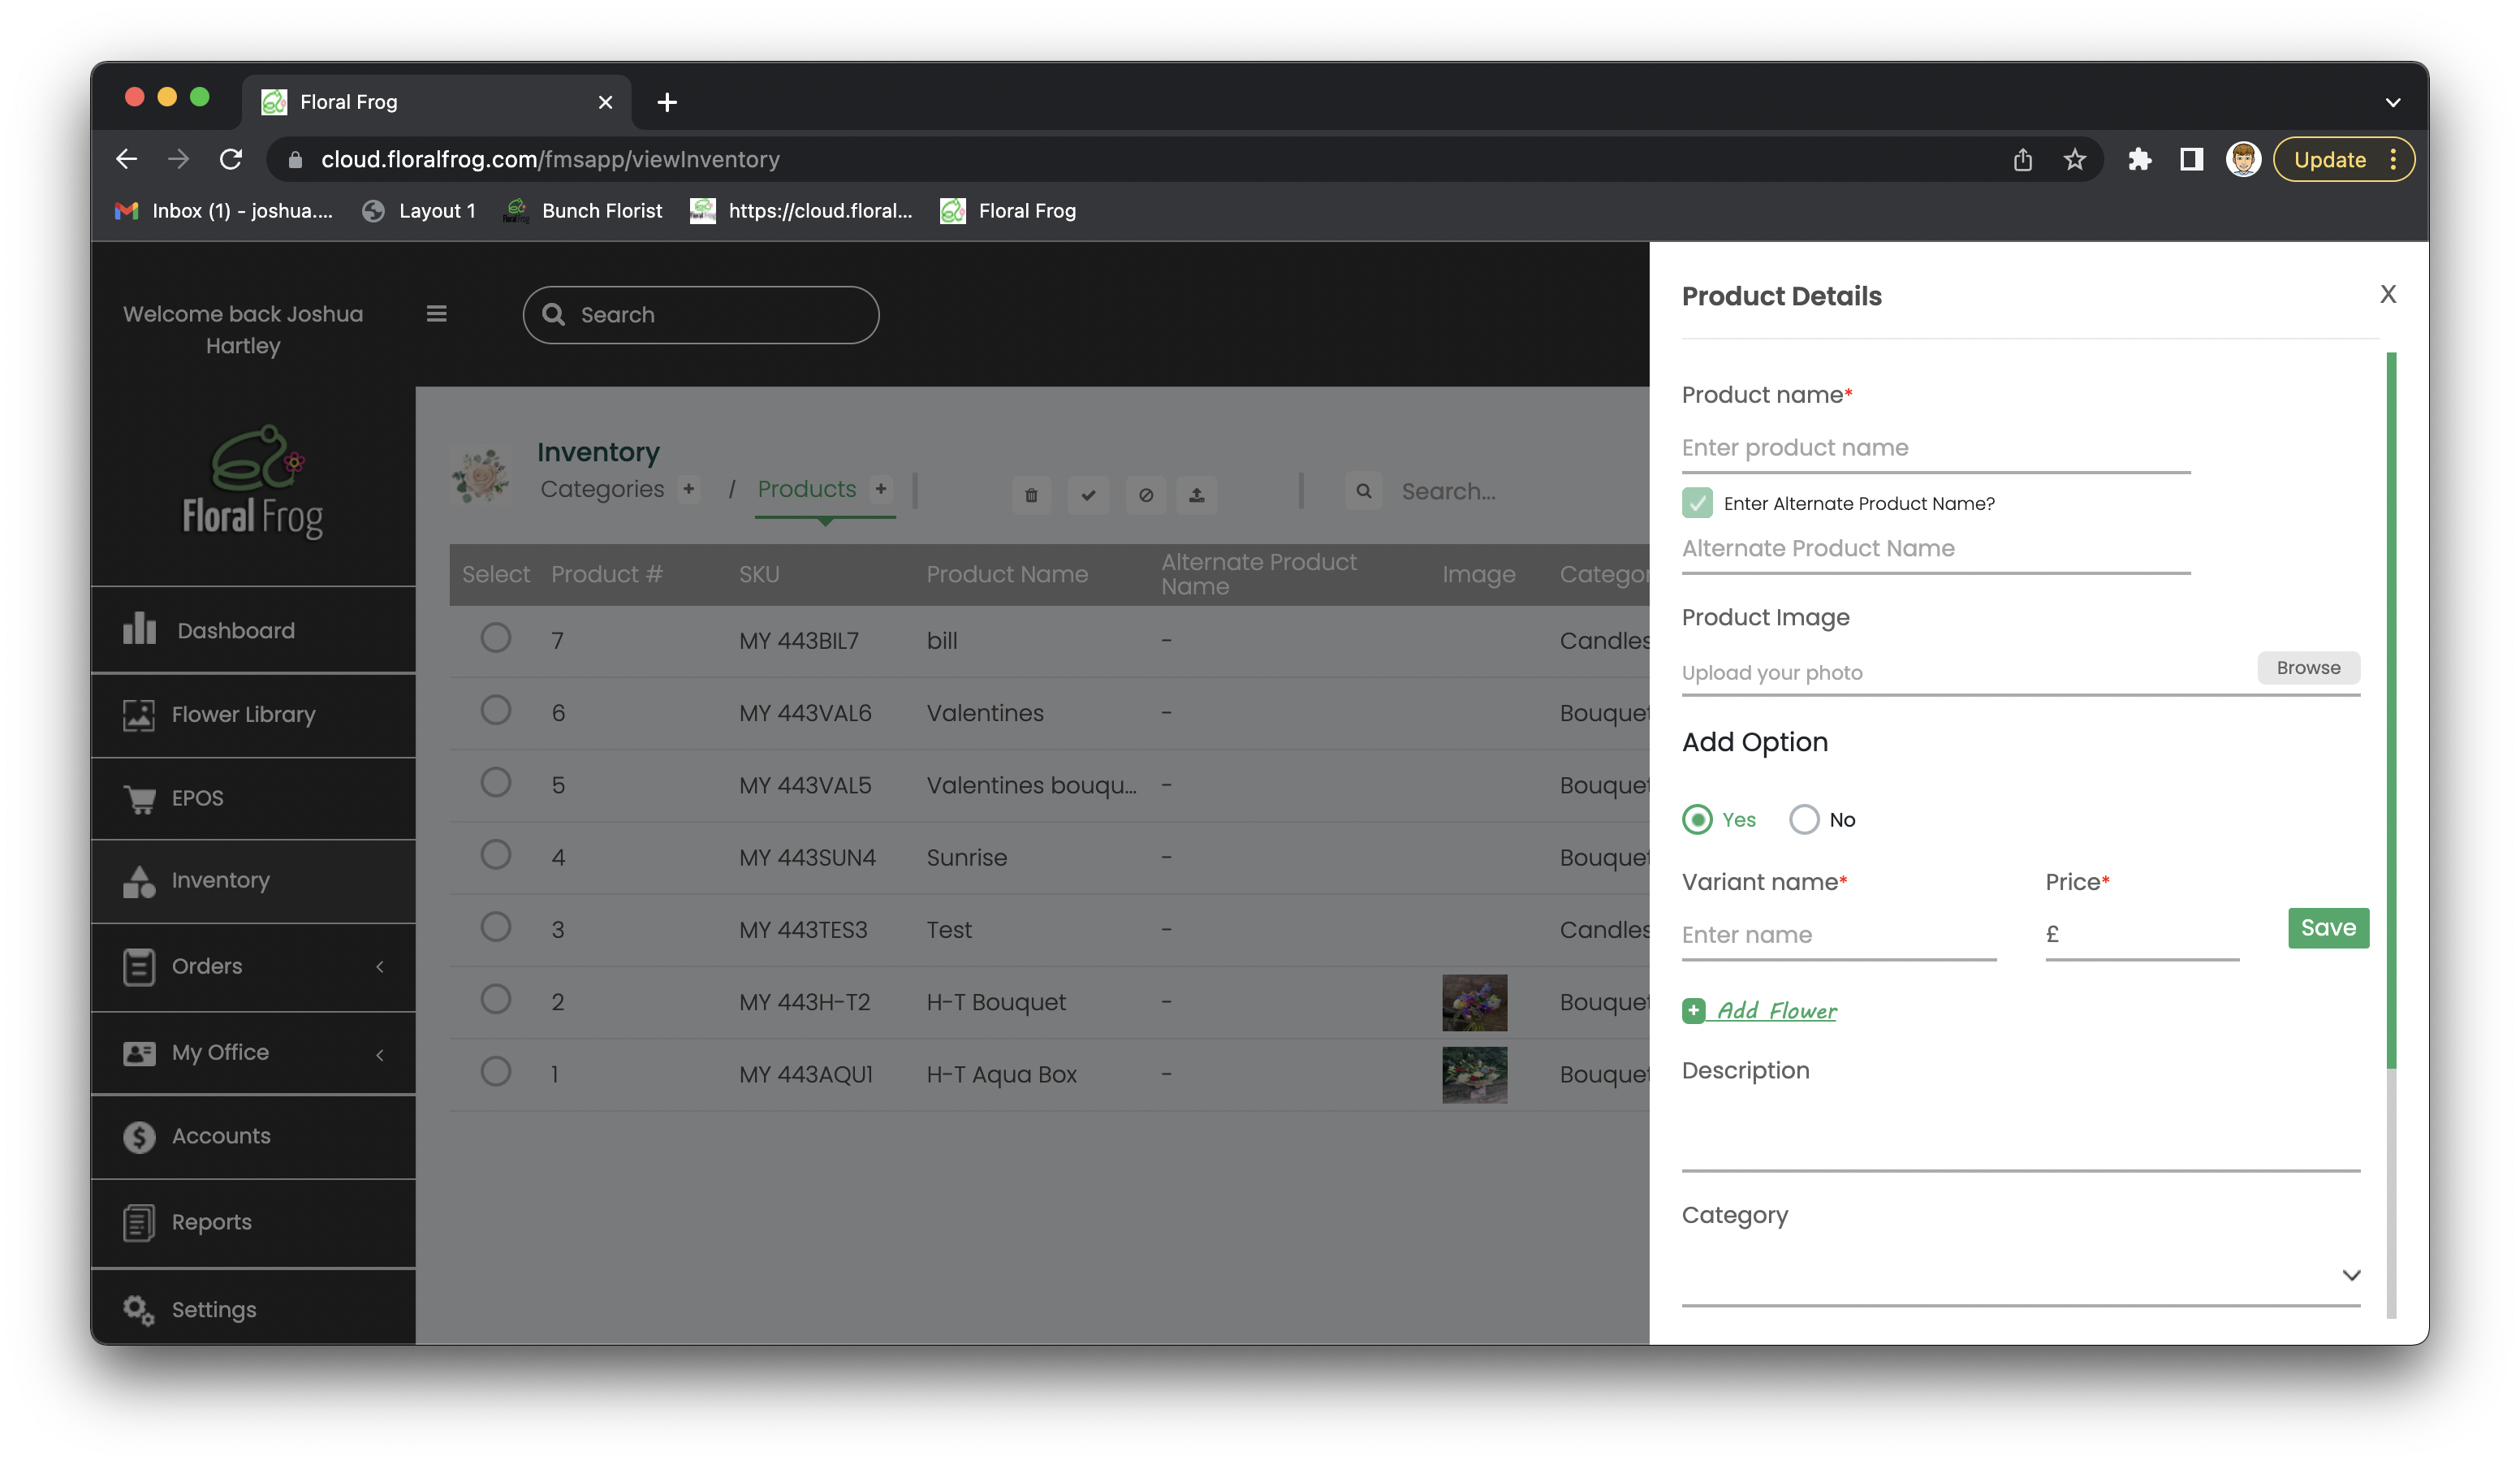
When adding products you have three options:
- Add a single price to your product
- Add multiple prices to your product
- Add your product without a price.
Adding a product with a single price
- Enter a product name, example “Summer Bouquet”
- Add an alternative name (optional)
- Add a product image (optional)
- Enter a single price, example £30.00
- Enter a description for your product (optional)
- Finally, tick the category boxes at the bottom where you want your product to appear. Example, if a Summer Bouquet then click “Bouquets” category and click “Save”
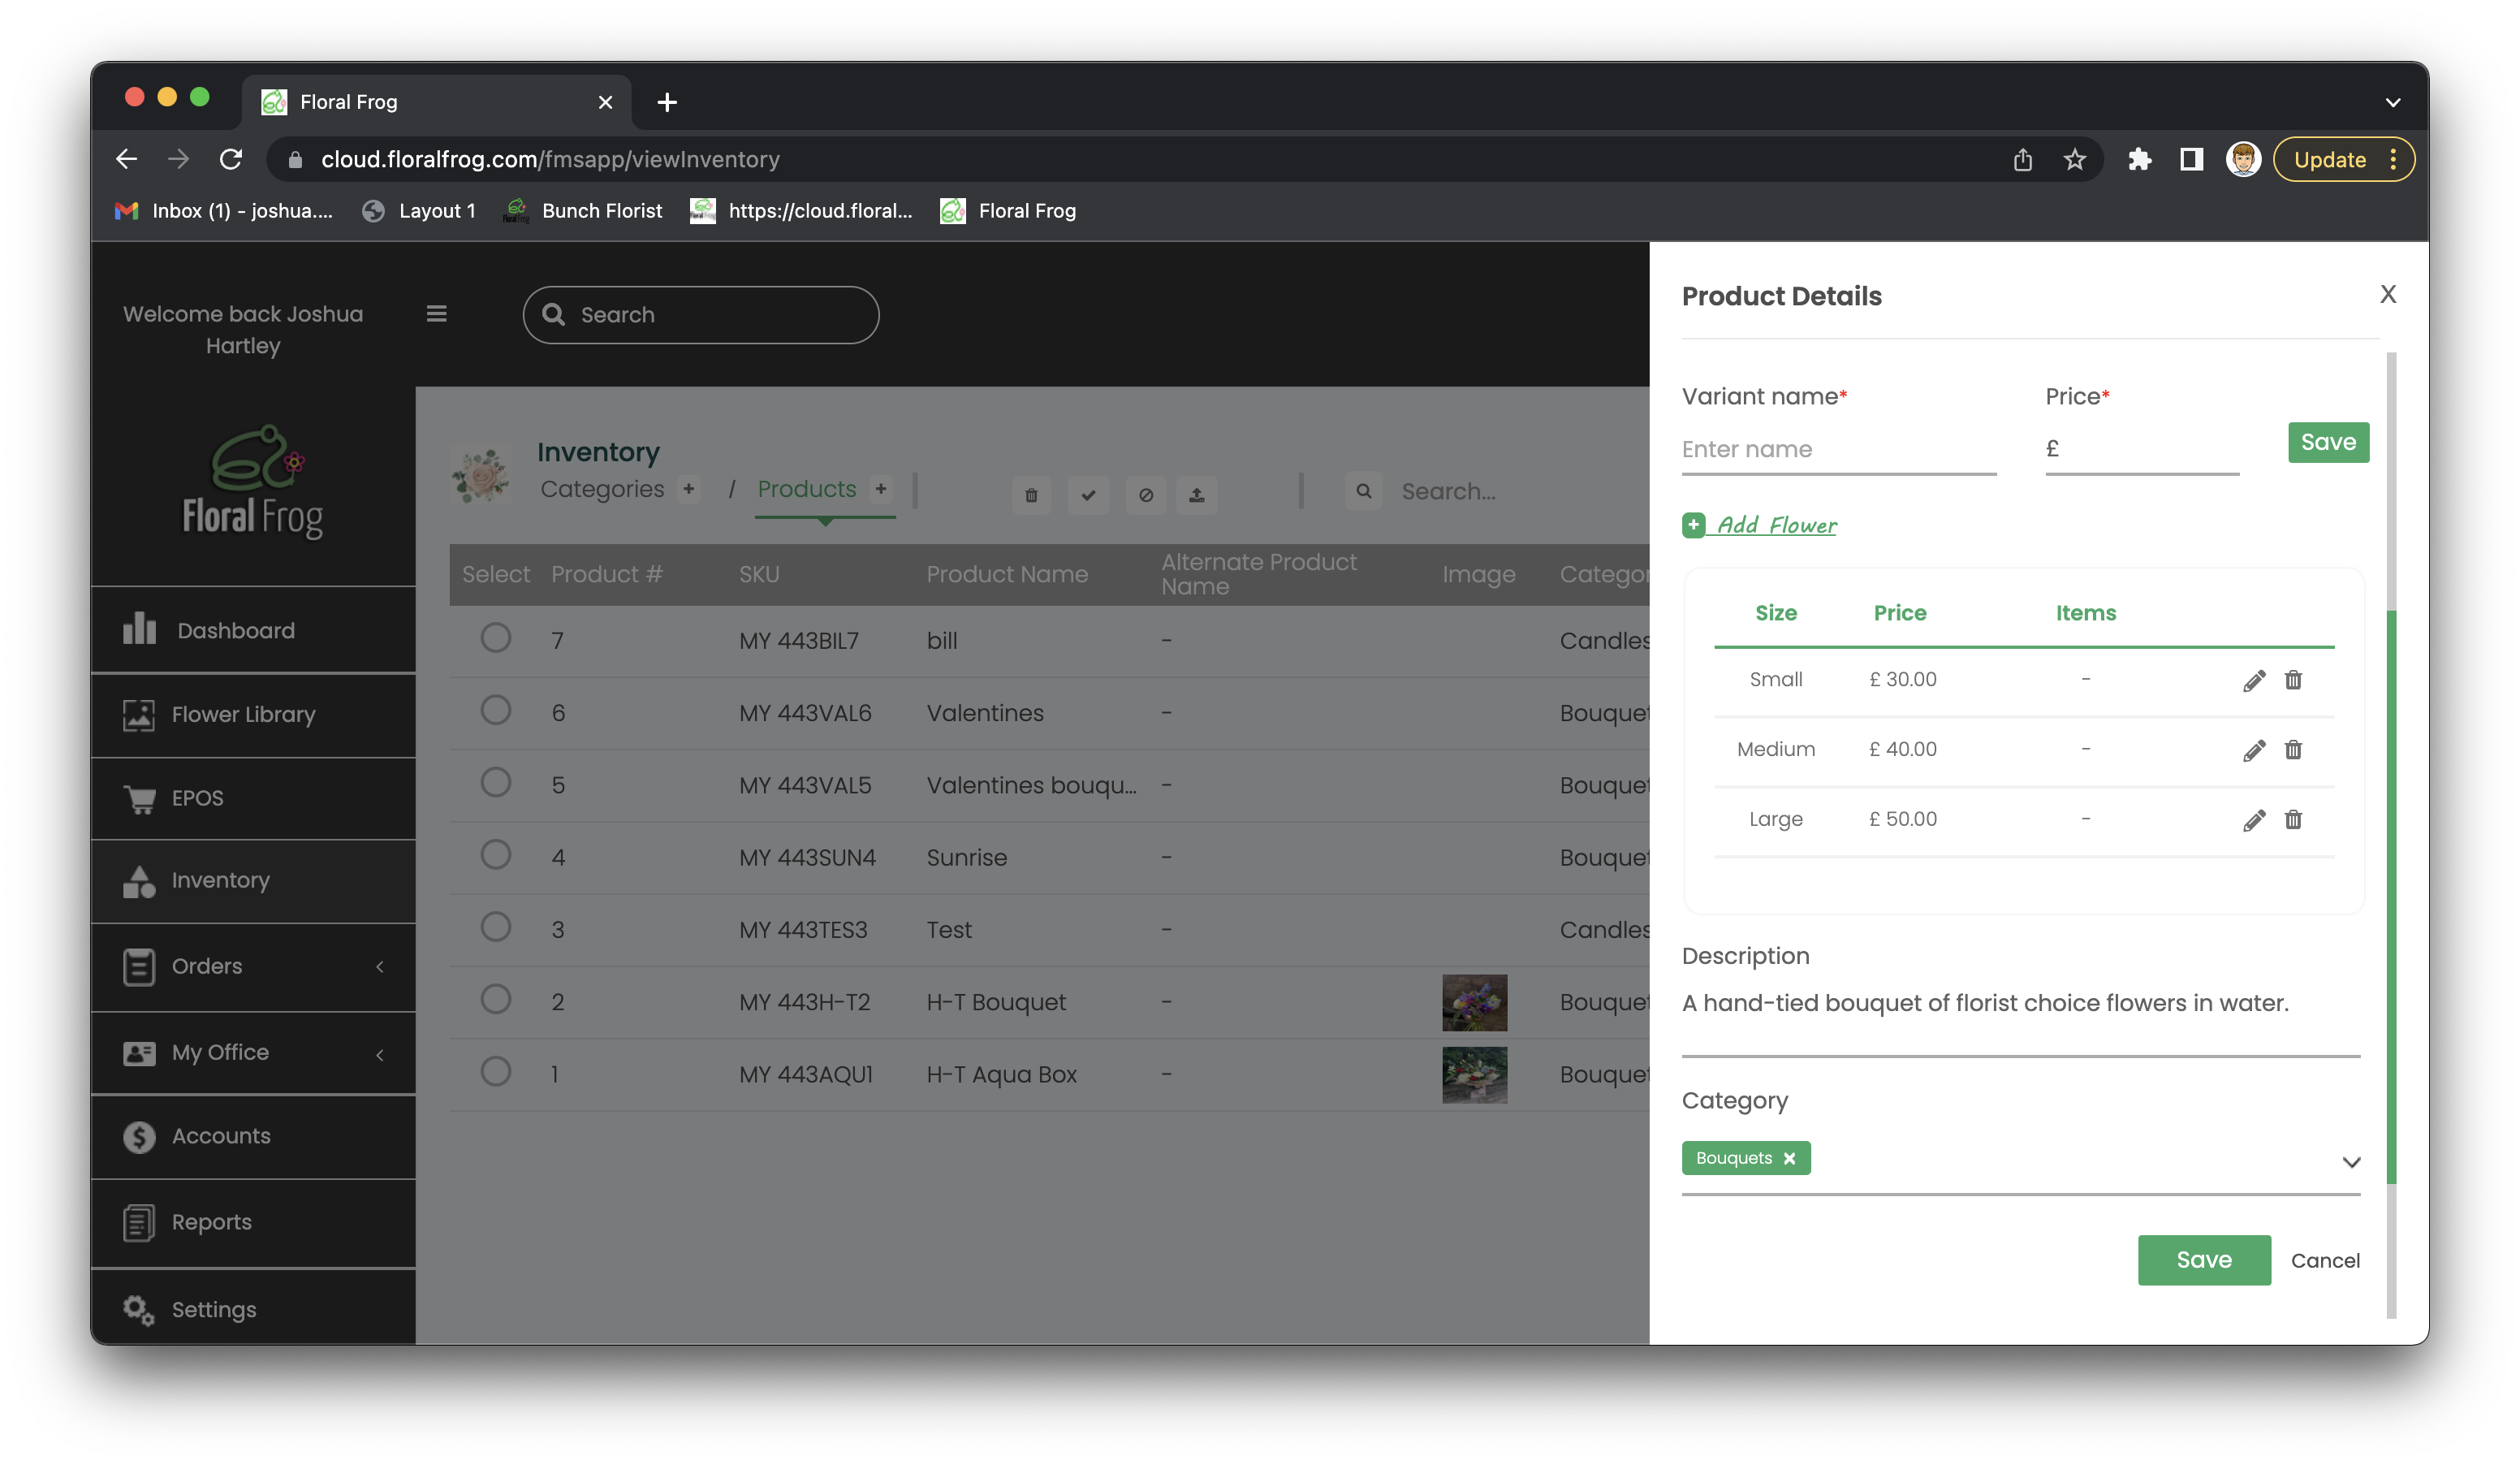
Adding a product with multiple prices
- Enter a product name, example “Summer Bouquet”
- Add an alternative name (optional)
- Add a product image (optional)
- Click “Add Option” and another box will appear below:
- Enter an option name, example Small
- Enter a price for your option, example £25.00
- Add any flowers used in the arrangement (optional)
- Then click “Save”
- Enter a description for your product (optional)
- Finally, tick the category boxes at the bottom where you want your product to appear. Example, if a Summer Bouquet then click “Bouquets” category and click “Save”